Client Incidents & Client Incident Report
A Client Incident record can be created in both SupportAbility's Web App and the Mobile App; however, this article focuses on the functionality in the Web App. Information regarding creating an Incident in the Mobile App is outlined in the Mobile Overview article linked at the end of this one.
Client Incidents are designed to record details specific to an Incident, including Incident Type, Category Level, Precursor to the Incident, what happened, and the outcome.
Follow-up actions can also be added to the Incident record, whereby the related Notification reminder will appear on the Dashboard of the nominated Staff Member.
Access to the related Client record is required to view Client Incidents. If 'Managers Only' has been selected, this privilege is also required to view the Client Incident.
There are three printable Reports available:
- The first prints the details of a single Client Incident record.
- The second report prints details of multiple Incident records for a single Client, based on the selected criteria (Date range, Incident Type, Category, and Tags).
- The third printable report contains details of Incident records for multiple Clients, based on the selected criteria (Date range, Incident Type, Category, Tags, Sites, and Services).
Information regarding these reports is outlined below.
An export file is also available; information on it is outlined in the related article linked at the end of this one.
N.B. This feature was initially designed to meet reporting requirements in Victoria. While it may not meet all specific compliance reporting criteria for each State and Territory, it can still be utilised by all providers.
Audience: Support Staff, Team Leaders
Summary
The following list summarises the content of this article. Click on the links below to take you to the relevant sections:
- Where are Client Incidents created?
- Creating a Client Incident
- What information can be recorded in Client Incidents?
- Client Incident Locking
- Printable Reports
- Client Incident Report Export
Where are Client Incidents created?
Client incidents can be created in both the Web App and Mobile App (as of Mobile App v.1.10.0).
They may be created from two places as follows:
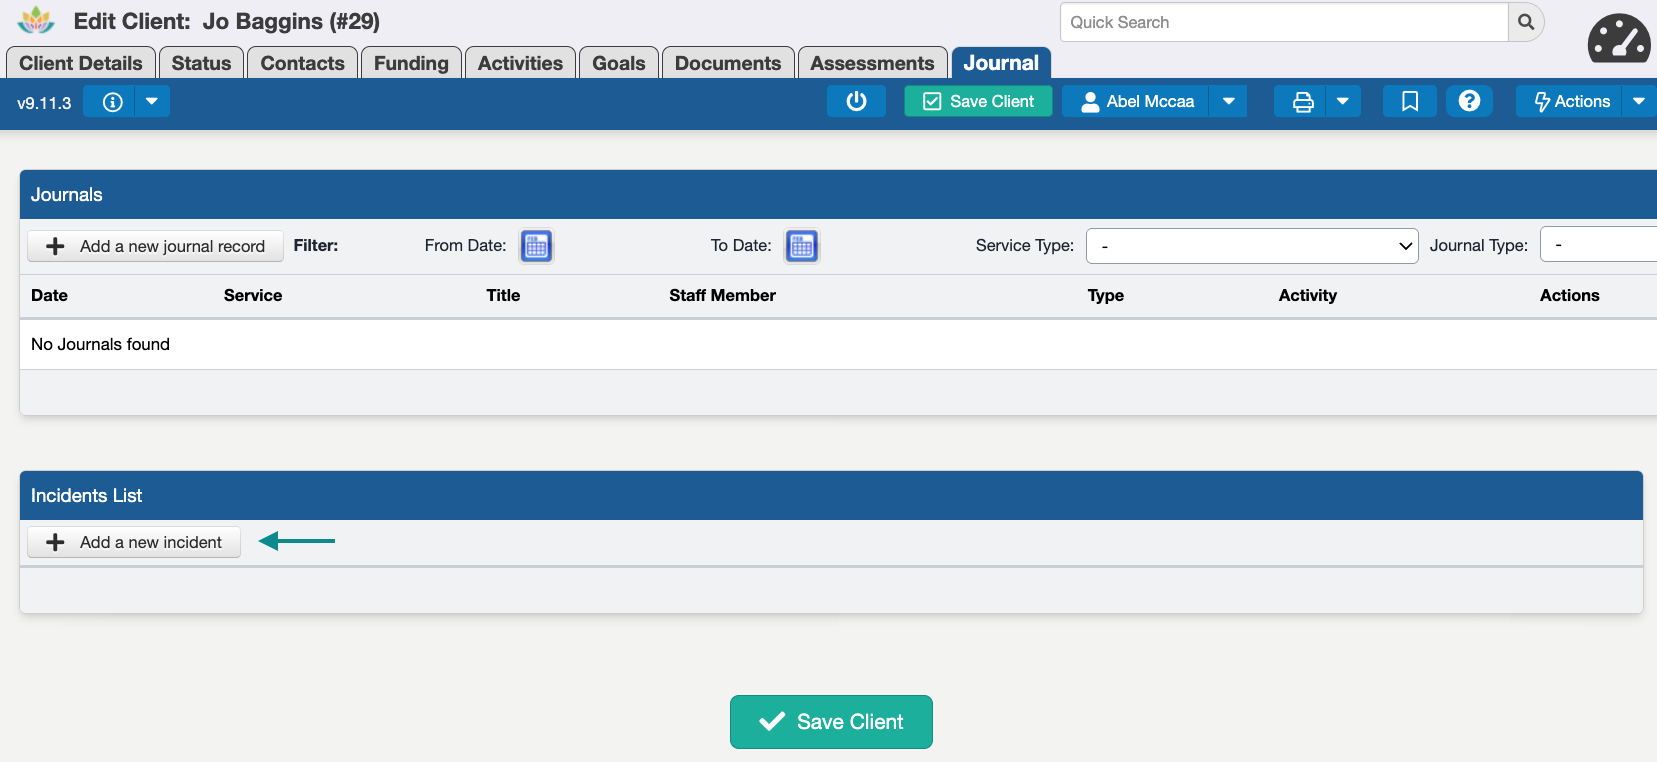
- 'Incidents List' section of the Journal tab in a Client record (Web App only)
- A Journal record (Web and Mobile Apps)
Web App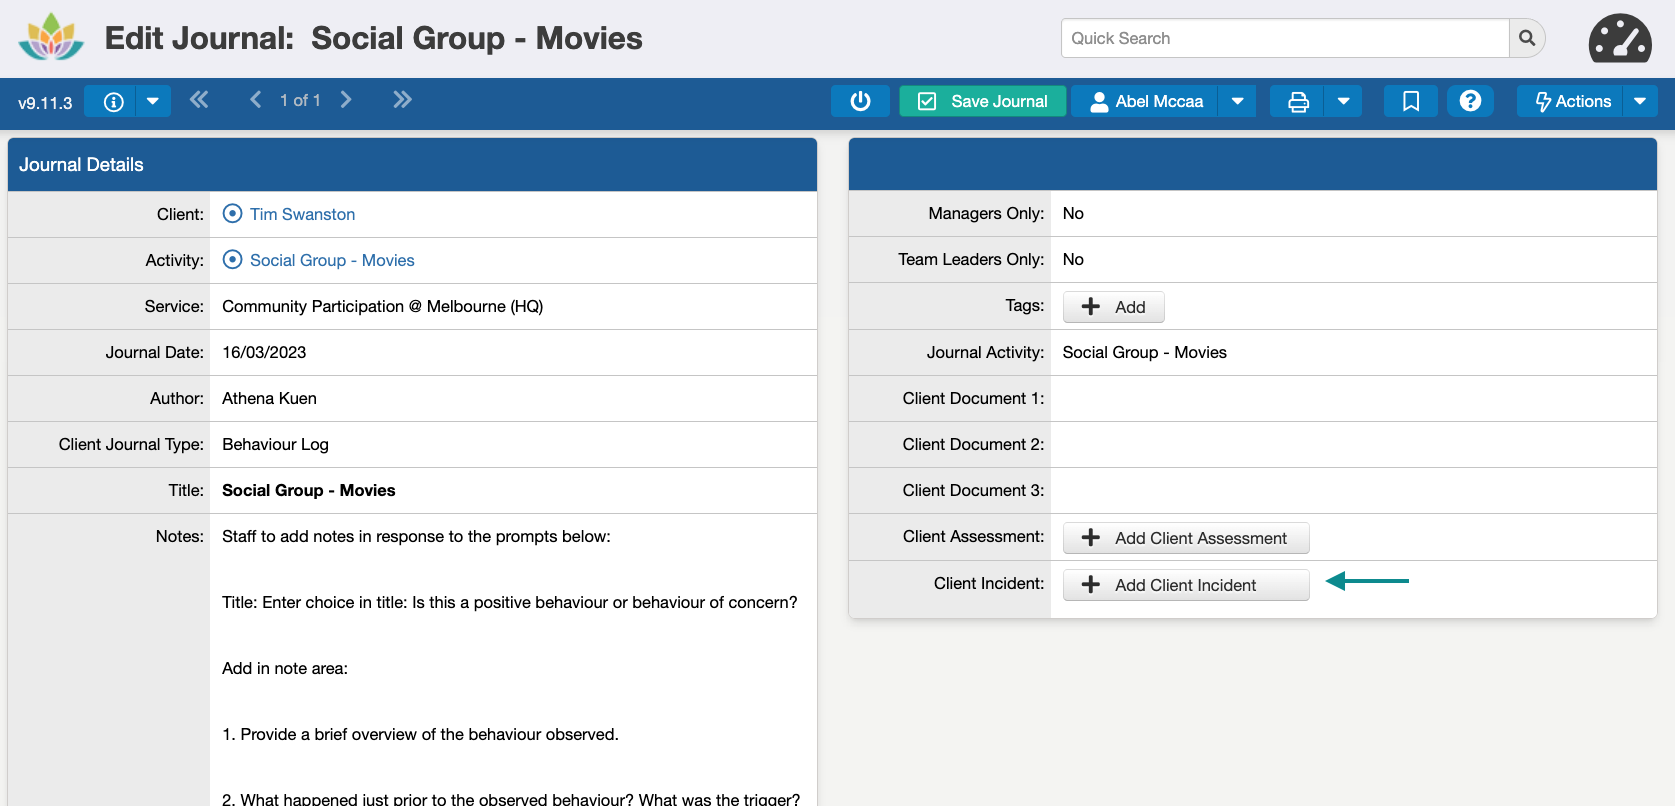
Mobile App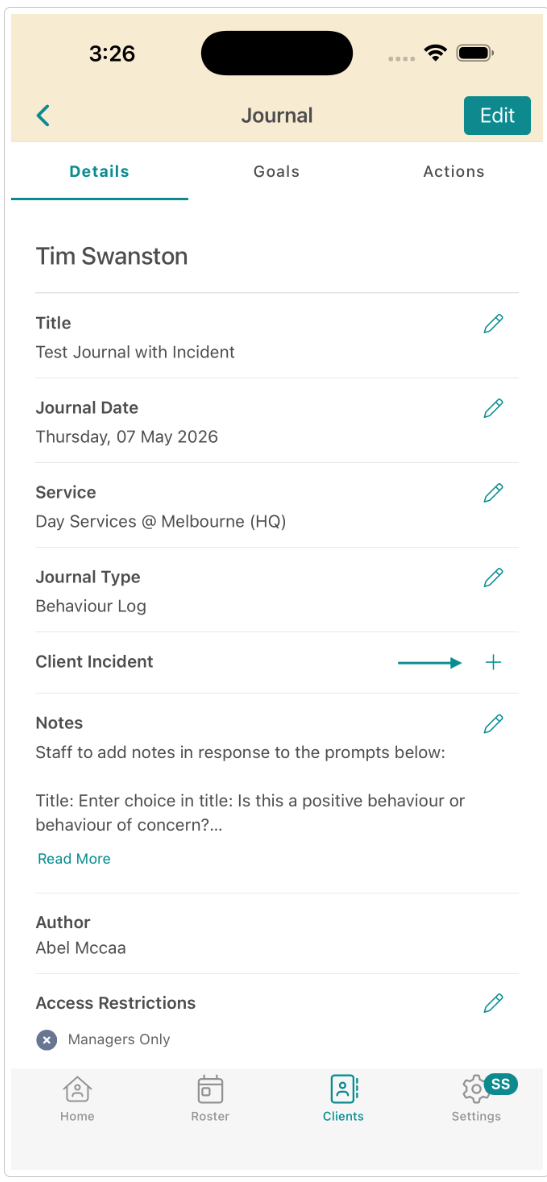


N.B. Detailed information outlining how to add an Incident in the Mobile App is covered in the Client Incidents on the Mobile App section of the SupportAbility Mobile App overview article linked below.
Creating a Client Incident
Begin by selecting the + Add a new incident or + Add Client Incident button, relative to the location where it is being created.
Creating from the Journals Tab
When creating an Incident from the Journals tab, the relevant Site and Service it relates to must be selected first:

N.B. The status of the Client's Service Participation is listed next to each of the Service@Site available for selection:
- Current - reflects that the Client is currently participating in the Site/Service
- Historical - reflects that the Client participated in the Site/Service historically
- Not Used - reflects that the Client has never participated in this Site/Service
N.B. The Site/Services displayed for selection are based on Staff Members' access privileges, not the Client's Service Participation.
Creating from a Journal Record
When creating an Incident from a Journal record, the Incident record opens directly, as the related Site/Service has already been determined when creating the Journal.
What information can be recorded in the Client Incident record?
Once a Client Incident has been created, the 'Edit Client Incident' window opens which contains the following sections:
- Incident Details
- Incident Report
- Standards
- Actions

Incident Details
The Incident Details section is where the following information is displayed/recorded:
- Client - the Client name relative to the Client record where the Incident is being recorded will automatically populate in this field
- Description/Title - this is a free-text field where a brief descriptive title of the Incident can be entered
- Recording Staff Member - this defaults to the person logged in however another Staff Member can be selected from the drop-down list where appropriate
- Manager's Only - if the information is of a sensitive nature the 'Managers Only' checkbox can be selected. Once selected and the Client Incident is saved, only Staff with the 'User is a Manager' Staff Account privilege can access and view this Incident. If the Staff Member recording the Incident does not have this privilege they will no longer be able to access, view or edit the Incident.
- Document 1, 2 3 - Documents that have already been added to the Client's Documents tab can be linked here when relevant
- Journals - Journals can be created directly from the Incident record to record Journal evidence about the Incident

Incident Report
The 'Incident Report' section is where the following information is displayed/recorded:
- Incident Date - this defaults to today's date, however, the actual date of the Incident can be selected via the calendar icon
- Incident Time - this defaults to '12.00 PM', however, the actual time of the Incident can be selected via the clock icon
- Duration of Incident - this defaults to '0.00 mins', however, the actual duration of the Incident can be entered
- Incident Type - is a customisable List that can be configured on the 'Lists' tab in System Preferences. Multiple options are included in the List by default, however, the List can be modified and/or additional types added as required by your organisation
- Incident Category - is a customisable List that can be configured on the 'Lists' tab in System Preferences. The default levels are 1, 2 & 3, however, the List can be modified and/or additional Category levels added as required by your organisation
- Location of Incident - is a free-text field
- Person Observing - is a free text field
- Precursor - is a free text field
- What Happened - is a free text field
- Response - is a free text field
- Outcome - is a free text field
- Type of activities whilst recovering - is a free text field
- Duration of Recovery - this defaults to '0.00 mins', however, the actual duration of Recovery can be entered

Standards
There are several in-built Standards available in SupportAbility, including:
- Each of the NDIS Practice Standards,
- the National Disability Standards, and the
- DMI Codes (Disability Maintenance Instrument), specific to providers of Supported employment.
To add a Standard to an Incident, simply select the +Add Standard button in the 'Standards' section of the Incident, which will open the Search function:

For example, to search for a Standard from the NDIS Practice Standards, (which are prefaced with 'QSF' in SupportAbility), you can either type 'Q' in the search field to access the full list of these Standards, or more specifically type a keyword e.g. 'Core' to narrow your search:

Once a Standard has been added, it will appear in the Standards section of the Incident record:

Further information regarding Standards in SupportAbility can be found in the Standards in SupportAbility and the Adding a Standard Knowledge Base articles linked below.
Actions
Client Incident Actions can also be added when there is follow up action that must be taken:

'Client Incident Action: Type' is a customisable List that can be configured on the 'Lists' tab in System Preferences. The default options include 'Meeting, Review and Phone Call', however, the List can be modified and/or additional Action Types added as required by your organisation.
The Client Incident Action will also appear on the Dashboard of the Staff Member assigned, provided the Staff Member has access to the related Client record and the Dashboard has been customised to display these notifications:

Client Incident Locking
As of SupportAbility v9.11, Client Incidents can now be locked in line with Journal locking by configuring a new setting in System Preferences.
This setting defaults to 0 (never lock), meaning there is no change in behaviour for existing providers. Providers wishing to lock Client Incidents in line with their Journal locking can update this setting at any time.
How to configure Client Incident Locking
Navigate to System Preferences from the main menu on the Dashboard, and select the Journals tab.
In the 'Client Incident Settings' section, enter the relevant number of days (e.g. 5) in the 'Lock client incident entries after' field:

N.B. This setting applies globally across all Client Incident records.
Select 'Save Preference Set' to apply the update.
What happens when a Client Incident is locked?
When a Client Incident is locked, the Incident record itself is locked from further edits.
A notification displays at the top of the Incident record advising ' Client Incident is locked - only Tags and Actions can be added or updated'.
However, Tags and Actions can still be added, updated, and progressed after the Incident is locked. This ensures that any follow-up Actions can continue to be created and worked through as required.

Printable Reports
Client Incidents may be viewed holistically across the organisation or for Clients participating in specific Services. Incidents may also be viewed for individual Clients only.
Incidents for Individual Clients
There are a couple of different ways in which to access Incident Reports for individual Clients.
Firstly navigate to the Journals tab of the relevant Client record and select Client Incident Report from the Print menu:

The Report displays information for all Incidents related to this Client that meet the search criteria selected:

The Report can be printed by selecting the Print icon located top right.
A Report can also be generated for an individual Incident. To access this navigate to the Journals tab and select the target icon of the relevant Incident:

Once the Incident record opens, select 'Incident' from the Print menu:

The Report generated displays information for this Incident only:

The Report can be printed by selecting the Print icon located top right.
N.B. The Client Incident Report can also be selected from within an individual Incident record and will display information for all Incidents related to this Client that meet the search criteria selected.
Client Incident Report by Site/Service
An Incident Report can also be generated filtering by Site/Service to display Incidents for multiple Clients related to the Site/Services selected.
To access this Report select 'Reports' from the Dashboard:

Then navigate to the Client Records subsection of the Clients section of the Reports menu and select 'Client Incident Report':

The Report may be filtered by the following search criteria:
- From Date
- To Date
- Category - options include -, 1, 2, 3
- Sites
- Services
N.B. Incident 'Category' is a customisable List that can be configured on the 'Lists' tab in System Preferences, as required.
The Report generated displays information for all Incidents that meet the search criteria selected:

Client Incident Report Export
The Client Incident Report Export, available from the Reports menu, allows staff to search and filter Client Incident records, preview the matching results on-screen, and download detailed Incident information in a CSV file.
Detailed information about this Report Search and related Export is outlined in the Client Incident Report Export article linked below.