SupportAbility Mobile App overview
The SupportAbility Mobile App focuses on providing access to the core functions required by support workers and other staff members who work in the field.
Whenever any information is entered or recorded in the Mobile App, this integrates with your organisation's SupportAbility installation (Web App) instantaneously and is available to view immediately.
A summary of the available features in the Mobile App has been outlined below. These include logging in, Check In/Out, Shift Sign Off, Capture Kms, viewing Client Information, adding Journals, viewing Rostered Shifts and Activity details, etc.
The 'Shift Sign Off' and 'Check In/Out' data completed in the Mobile App is available to view in the 'Shift Sign Off' and 'Recorded' columns, respectively, in the Staff section of the Activity record in the Web App.
Data included in Staff Timesheets is determined by how the 'Finalised' column in the Web App has been configured, either to use the 'Rostered' or 'Recorded' data.
To view a video recording of a walkthrough of the Mobile App functionality, please click here.

Privileges:
- Staff require the 'Edit System Preferences' privileges in order to configure 'Mobile App - Check In/Out' and the 'Staff Shift Settings'.
- Staff require access to the relevant Clients, as configured in the Web App, in order to view Client information in the Mobile App.
Audience: All
Summary
The following list summarises the content within this article. Click on the links below to take you to the relevant sections:
- Considerations before implementing the SupportAbility Mobile App
- Summary of the available features in the SupportAbility Mobile App
- Provider feedback and support
- Minimum operating system requirements
- Minimum SupportAbility Mobile App version
- Download the SupportAbility Mobile App
- Log in securely
- Home screen
- View Client information
- View rostered shifts
- Settings
Considerations before implementing the SupportAbility Mobile App
Should your organisation wish to commence using the Mobile App, we recommend providers assess the available functionality first to understand what can be completed using the Mobile App and what still needs to be completed using the Web App.
It will also be important to determine which of the following functions staff are required to complete in the Mobile App, i.e. Check In/Out, Record Kms, and Sign Off their Shifts, as this this might change your current workflow. Therefore, we recommend piloting the relevant functionality first.
Each of the above-mentioned functionality can be turned 'On' or 'Off' as required and configured by Service. Configuration is completed on the Services tab in System Preferences.
It will be important to ensure that all data recorded/completed in the Mobile App has been synchronised to the Web App prior to the activity sign-off being completed.
Summary of the available features in the SupportAbility Mobile App
It is important to clarify that the mobile app does not provide access to the full functionality of the standard SupportAbility web app, instead, it focuses on providing access to the core functions required by support workers and Staff who work in the field.
The first version of the SupportAbility Mobile App includes the ability to:
- Security
- Log in securely
- MFA is required where applicable (once this has been configured by your organisation and activated in the Web App)
- Use PIN Code security when accessing the app after the first login
- Reset your password as required via Settings
- Log in securely
- Home screen
- Navigate to your next shift from the Home screen
- View assigned Journal Actions from the Home screen
- View Client information
- View the list of Clients you have access to
- View Client Details and Warnings
- View Client Status tab information
- View Client Contacts
- Initiate calls and/or SMS' to Clients/Client Contacts
- View, add, and edit Client Journals and Journal Actions
- Link Client Goals/Goal Strategies to Client Journals and add Goal Progress Assessments
- View or add a Client Incident and Client Incident Actions
- View your Roster
- View Activity information via the Roster
- Mark a Client as Absent and add the relevant Short Notice Cancellation Reason where required
- Add/edit Non-Replicating Staff Notes in Activities via the Roster
- View and/or add Client Journals from the Client tab in the Activity record
- Check In and Out of Staff shifts (configurable by Service and available in the Mobile App only)
- Record kms in the Staff tab in the Activity record (configurable by Service)
- Edit your Recorded Shift Time independently to Check In/Out should this differ from your Rostered Time
- Complete Shift Sign Off
Web App updates
Some updates to the Web App are also included with the upgrade to SupportAbility v8.0.0, such as:
The ability to configure the following for each Service in System Preferences:
- Mobile App - Check In/Out
- Record Time, or
- Record Time and Location
- Mobile App - Record kms
Once configured and in use, this data can be viewed via status flags in the Staff section of the Activity record.
Please see below for screenshot examples related to each of these key areas.
Provider feedback and support
We would like to encourage Authorised Customer Representatives to let us know what features and functional are needed to help staff in completing everything they need to do in the field using the SuppportAbility Mobile App.
It is important to note that users can provide general product feedback via Settings in the Mobile App. However, this is a one-way feedback mechanism and feedback submitted using this feature is not monitored and managed as the Customer Success team at SupportAbility does with helpdesk support. It is designed to capture general feedback about the product for our Product Team, rather than a tool designed to provide users with support.
If staff encounter any issues with the SupportAbility Mobile App, they can escalate them to SupportAbility as per the standard process following the provision of first-tier support.
Minimum operating system requirements
The operating system on a Staff Member's mobile device must meet the minimum version requirements to download the latest version of the Mobile App from the respective app store.
Why does the Mobile App have minimum operating system requirements?
The minimum operating system version is determined by Apple (iOS) and Google (Android) for their respective app stores.
When developers create and submit apps to these stores, they must ensure compliance with all store requirements; otherwise, the submission will be rejected. One key requirement is that the app must specify a minimum supported operating system version.
As a result, when updates to the SupportAbility Mobile App are developed, we must review and adhere to the relevant minimum operating system requirements as part of the release process.
What are the current minimum operating system requirements?
The current minimum operating system requirements are as follows:
- Apple - iOS 15 (Initial release September 2021)
- Google - Android 12 (initial release October 2021)
How do I identify the operating system version my mobile phone is using?
The operating system version number can be found in the device's settings.
The following links provide step-by-step instructions on how to determine the operating system version on the mobile device:
What happens if I can't download the latest version of the Mobile App?
If Staff Members are unable to download the latest version of the SupportAbility Mobile App due to an incompatibility with their device’s operating system (e.g. running an outdated version), they may still be able to use the older version of the Mobile App.
However, it's important to note that any new features introduced in the latest version of the Mobile App will not be accessible and may also lead to issues with syncing data to the Web App.
Minimum SupportAbility Mobile App version
When the Apple (iOS) and Google (Android) app stores update their minimum OS requirements for mobile apps (as outlined above), the minimum SupportAbility Mobile App version must also be reviewed to ensure that any new updates meet these new requirements to be approved.
To comply with security standards, the current minimum version of the SupportAbility Mobile App is v1.6.3 (March 7th, 2025).
Users who are using a version of the Mobile App that is older than this minimum version may be required to update their app to continue using it.
If your staff are using older smartphones (typically more than four years old), they may not be able to update to a later version of the SupportAbility Mobile due to using an older operating system.
To ensure compatibility and optimal performance, we recommend that staff use a smartphone no older than four years.
Download the SupportAbility Mobile App
Users with a mobile device running the Apple iOS operating system will download the SupportAbility Mobile App from the Apple App Store.
Users with a mobile device running the Google Android operating system will download the SupportAbility Mobile App from the Google Play Store, as shown below.
Enter SupportAbility in the search bar, then select Install:

Once the device has downloaded and installed the SupportAbility app, select the 'Open' button:

This will navigate you to the initial login screen as outlined below.
From the upgrade to v1.10.0 of the Mobile App (May 2026), the background colour of the app tile is now cream:

Log In Securely
To log in to the Mobile App, enter your SupportAbility installation name, e.g. provider:

This is the same as the domain name you type into the web browser to access SupportAbility on the Web App.
Once you’ve selected ‘Next’, it is important to note that the Company Name your organisation has configured in System Preferences in SupportAbility is displayed here, e.g. ‘All Star Provider'.
Enter your Individual Username and Password to log into the Mobile App:

If your organisation has enabled Multi-Factor Authentication (MFA), the 6-digit MFA code from your authenticator app will be required to log in successfully:

If you have not activated MFA yet and need to, this will need to be completed using the Web App. Please see the How to activate Multi-Factor Authentication (MFA) for your Staff Account article linked below for more information.
If you have any issues logging in, please use the reset password feature, or you can contact your System Administrator for support.
Set PIN
You will be asked to set a 4-digit PIN that is saved to your phone, which you will be prompted to enter to access the app in future:

Once you have logged into the SupportAbility Mobile App and set your PIN, you will land on the Home screen.
N.B. You will be required to input the 4-digit PIN when attempting to access the app after (5) minutes of inactivity.
Home screen
The Home screen allows Staff to navigate to their next shift in the Roster and view assigned Journal Actions:

If your organisation has set up Dashboard Broadcast messages, these are also displayed at the top of the Home screen, as shown in the example above.
View Journal Actions
You can select any of these options to navigate to a list of incomplete Journal Actions assigned to you, e.g. Overdue:

Once selected, this will take you to the list of overdue Client Journal Actions assigned to you:

From here, the relevant Journal Action can be selected, taking you to the Actions tab of the Journal record:

Select the arrow to review and/or complete this:

Swipe gestures to complete Journal Actions
From the upgrade to SupportAbility v8.2 (released on the evening of the 31st of October, 2023), Journal Actions can now be completed by swiping the Journal Action left to complete the action e.g.:

Once complete, a message will appear highlighting this has been saved:

To update a completed Journal Action to 'Incomplete', swipe left again as required:

Journal Actions can also be deleted by swiping right:

Once delete is selected, a confirmation window will open to confirm this before it is deleted.
It is important to note that these swipe gestures will appear in grey if you do not have permission to action this.
View Client information
The SupportAbility Mobile App allows you to view the list of Clients you have access to:

Initiate calls, SMS or maps
Once you've found the Client you're looking for, e.g. Tim Swanston, select their name from the list.
You can then initiate a call, SMS or navigate to the address details for the Client or their primary Contact from the list view as required, e.g. to call Tim or Linda, Tim's Mum:

Navigate to the Client record
Select the teal arrow on the right of the Client's name to navigate to the Client's record, which will land you on the Client Details screen.

Client Warnings
If your organisation has configured the requirement that Client Warnings must be acknowledged, these will appear first:

Once these Warnings have been acknowledged, they can be accessed again at any time from the triangle exclamation point icon on the top right-hand corner of the screen:

Client Details
Once Client Warnings have been acknowledged as required, you will be taken to the Client Details screen:

When accessing Client information via the Mobile App, this is 'read only'. If Client information needs updating, this must be completed using the Web App.
Client Status
From here, you can navigate to the Status screen to view a summary of information entered in the Client's Status tab on the Web App:

Select the relevant option to view more information, e.g. Medical Conditions:

When a Client Document has been linked in the Web App, the Document name will be listed here with a link out to view this in the Web App should you need to review this as follows.
Client Documents - Web App only
At this point in time, Documents can only be accessed from mobile via the link to the Web App:

This will open up the Web App on your phone via your default web browser, noting that you will need to log into SupportAbility again in this instance, and the Shared Username and Password will be required.
N.B. When [RESTRICTED DOCUMENT] is displayed, this means that the linked Client Document is set for 'Managers Only' or is locked by a Service you do not have access to.
Providing access to Client Documents via the SupportAbility Mobile App is on our radar, but it is a more involved development piece due to the associated privacy and security considerations.
Client Contacts
Client Contacts can be viewed by selecting the Contacts tab, and selecting the teal arrow:

More details about the Client Contact can be viewed here:

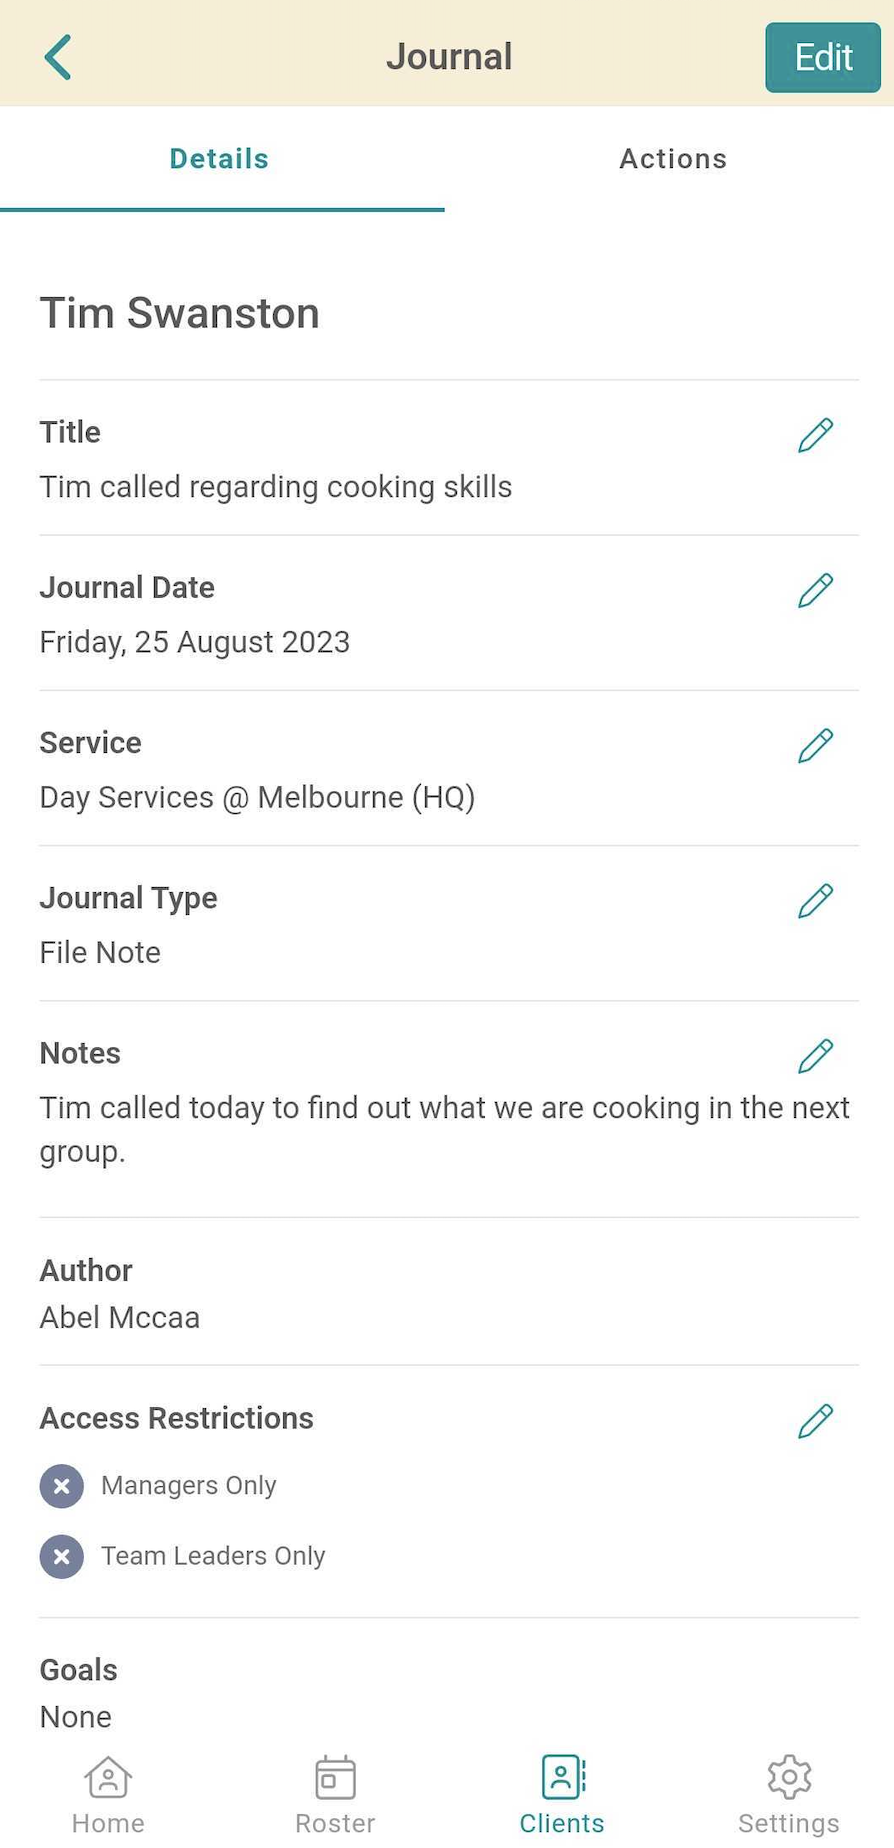
Client Journals
Client Journals can be accessed by selecting the Journals tab. To view a Client Journal, select the teal arrow:

This opens the Client Journal record:

Actions can be viewed and completed or added as required from the Actions tab:

To add a Client Journal, select the 'Add Journal' button:

The relevant information can be recorded:

Once saved, Journal Actions can be added as required via the Actions tab:
Link Client Goals/Goal Strategies to Client Journals

From the upgrade to version 1.3 of the SupportAbility Mobile App (6th of December, 2023), Client Goals and/or Goal Strategies can be linked to Client Journals, and Goal Progress Assessments can be added as required.
Once a Client Journal has been added and saved in the SupportAbility Mobile App, a new ‘Goals’ tab will appear, allowing you to link the relevant Client Goals/Goal Strategies to the Client Journal:

Selecting the 'Link a Goal Strategy' button on the Goals tab:

Displays a list of the Client's Goals and related Goal Strategies:

Once a Goal or Goal Strategy has been selected, Notes and a Goal Progress Assessment Score may be added where required:

If Strategy Tasks have been added to a Goal Strategy in the Web App, they can be viewed here by selecting the relevant button. Alternatively, if no Strategy Tasks have been added, 'NO STRATEGY TASKS AVAILABLE' will display, as shown above.
Once the linked Goal/Strategy, Notes and Assessment have been saved; they will display on the Goals tab as follows:

N.B. Goal Progress Assessment Scores are configured in the Web App and the Assessment Score colours, e.g. when 10 levels have been configured, are as follows:
- 1 -
3 amber - 4 - 7 blue
- 8 - 10 green
Goals/Goal Strategies linked to historic Client Journals may also be viewed on the Goals tab, along with the associated Notes and Goal Progress Assessment Scores.
Client Incidents on the Mobile App
From the upgrade to version 1.10.0 of the SupportAbility Mobile App (7th of May 2026), Client Incidents can be created, viewed and updated from a Client Journal record in the Mobile App. Client Incident Actions can also be added and managed in the Mobile App, mirroring the relevant functionality available in the Web App.
A Client Incident in the Mobile App is always created from a Journal record — a Journal may have at most one Client Incident linked to it.
Add a Client Incident
To add a Client Incident, a Journal record must first be added and saved, then you will see the ability to select the + button next to Client Incident:

This creates the Client Incident, links it to the Journal, and opens the Client Incident edit form. The form is organised into two tabs: Details and Actions.

Incident Details
The following fields are available on the Details tab, mirroring the Web App:
- Client — automatically populated from the Client Journal record.
- Description/Title — a brief, descriptive title for the incident (free text).
- Recording Staff Member — defaults to the logged-in Mobile App user. This field is not displayed in the Mobile App; if it needs to be updated, this can be done in the Web App.
- Managers Only — when selected, restricts visibility of the Client Incident to Staff Members with the 'User is a Manager' privilege.
Incident Report
- Incident Date — defaults to today's date; the actual date can be selected as required.
- Incident Time — defaults to 12:00 PM; the actual time can be selected as required.
- Duration of Incident — defaults to 0.00 mins; the actual duration can be entered.
- Incident Type — selected from a configurable list (set up in System Preferences > Lists in the Web App).
- Incident Category — selected from a configurable list (set up in System Preferences > Lists in the Web App).
- Location of Incident — free text.
- Person Observing — free text.
- Precursor — free text.
- What Happened — free text.
- Response — free text.
- Outcome — free text.
- Type of activities whilst recovering — free text.
- Duration of Recovery — defaults to 0.00 mins; the actual duration can be entered.
Remember to select 'Save' to save what you have entered.
Client Incident Actions
Multiple Actions can be added to a Client Incident, similar to Journal Actions. Once the Client Incident has been saved, the Actions tab becomes available alongside the Details tab.
To add a Client Incident Action, select the Actions tab, then select 'Add Action':

The following fields are available, mirroring the Web App:
- Type — selected from a configurable list (set up in System Preferences > Lists in the Web App; defaults include Meeting, Review, and Phone Call).
- Action — free-text description of the action to be taken.
- Staff Member — the Staff Member responsible for the follow-up action. Selecting a Staff Member here drives a Dashboard notification for that Staff Member in the Web App.
- Due Date — date picker.
- Completed — date picker; populate this once the action has been completed.
Existing Actions can be viewed, edited, and (subject to privileges) deleted from the Actions tab.
View a Client Incident from a Journal record
The 'Incident' section is displayed on the Details tab of the Journal record, directly above the 'Notes' section. What appears in the Incident section depends on whether an incident has been recorded and on the user's privileges:
- An incident exists, and you have permission to view it — its description is displayed. Select it to open the Client Incident record.
- An incident exists, but you do not have permission to view it — the text 'No permission to view the incident' is displayed, and the section is not selectable.
- No incident exists, and you have permission to create one — a 'Create Incident' button is displayed. See below.
- No incident exists, and you do not have permission to create one — nothing is displayed in the Incident section.
Locked Client Incidents
When a Client Incident is locked, a blue informational banner is displayed at the top of the Client Incident record in the Mobile App, consistent with the behaviour of locked Journal records in both the Mobile and Web Apps.
The behaviour of a locked Client Incident in the Mobile App depends on the user's privileges:
- Fully locked (read-only) state — applies when the user does not have privileges to edit the locked record. In this state:
- Incident fields are read-only.
- Tags cannot be added or removed.
- Action fields are read-only.
- Exception — Actions assigned to the logged-in Staff Member — if a fully locked Client Incident contains Client Incident Actions assigned to the user currently logged in, those specific Actions remain editable. A 'Save' button is displayed for these Actions, and 'Delete' is available; 'Duplicate' is not available.
The 'Edit Lock Journals' privilege controls whether a user can edit locked Client Incidents (and locked Journal records), consistent with the Web App. Configuration of this privilege is completed on the Roles tab in System Preferences in the Web App.

View rostered shifts
To view your Roster, you can select your next shift from the Home screen:

This will take you to this shift in your Roster:

Or you can select the Roster from the bottom of the screen.
You will land on the current week when the Roster is selected. The current date is coloured teal, the other dates displayed that include shifts appear as grey, whereas dates with no shifts appear as white.
Select the single arrows to navigate the different days of the week. To navigate to different weeks, select the double arrows. Shifts four weeks into the future (from the current day) can be viewed, as can shifts that occurred up to four weeks in the past.
You can Check In to your shift from here, provided your organisation has configured this and this becomes available one hour prior to the shift start time. More on this is outlined below.
Navigating to the Activity record
Click on the shift to navigate to the Activity, which takes you to the Activity Details:

Edit Non-Replicating Staff Notes
Non-Replicating Staff Notes can be added by selecting the Edit button:

This is a great way to communicate important information to Team Leaders or Managers who may need to adjust the Activity Settings or Client NDIS Support Allocations accordingly:

Remember to select 'Save' to save what you have entered.
Activity Clients
Select the Clients tab in the Activity to view the Clients scheduled into this Activity:

Client information summary from the Activity Clients tab
From the upgrade to the SupportAbility Mobile App version 1.1.0 (Monday evening, the 9th of October, 2023), a Client information summary is available from the Activity Clients tab.
Select the Client’s name:

To open a summary including quick links to make contact with the Client or to navigate to their address, Preferred Language (when entered in the Web App), Preferred Contact Method (when entered in the Web App), Age, Gender, any red or amber Client Warnings. A button is available at the end of the summary allowing you to open the full Client record as needed:

Once 'Open Client Record' is selected, you will be navigated to the Client record. To go back to the Activity Clients tab, select the Roster.
Add a Client Journal
Client Journals can be added from here by selecting 'Add Journal':

This automatically links the Journal to the Activity:

As mentioned above, the ability to link Client Goals/Goal Strategies to Client Journals and add Goal Progress Assessments is not yet available and is expected in a future release.
Marking a Client as Absent
A Client can be marked as Absent from the Activity Clients screen when required:

Updating the Short Notice Cancellation Reason
When NDIS Supports have been allocated for a Client in the Web App that are subject to Short Notice Cancellations, when Absent is selected, the ability to enter the relevant Short Notice Cancellation will appear:

Once selected, the reason will appear under the Absent button:

Activity Staff
Select the Staff tab in the Activity to view the Staff shifts related to this Activity, including your own:

If this were a group Activity with more than one Staff Member, you would also see another section underneath this called 'All Shifts', for example:

Check In/Out
Once 'Mobile App - Check In/Out' has been configured for a Service in the 'Generic Settings' on the Service tab in System Preferences, the ability to Check In and Out will be available in the Mobile App, for Activities created for that Service.
The 'Check In' and 'Check Out' buttons will display in the Activity in the Roster view and on the Staff tab of the Activity:

This functionality becomes available/active one hour prior to the start of the Shift.
Once the 'Check In' button is selected, this will display the time that you Checked In, e.g. 2:59pm:

N.B. Once you have checked in/out, this now displays with 'Recorded From/To' instead of 'Checked In/Out At' to better align with how this appears in the Web App.
For more information, we recommend reviewing the How to Check In/Out and Record kms using the Mobile App article linked below.
Record kms
If 'Capture Kms' has been configured for a Service in the 'Staff Shift Settings' on the Service tab in System Preferences, the ability to record Company and Private kilometres will be available in the Mobile App, for Activities created for that Service.
The 'Record Kms' button will display on the Staff tab of the Activity in the Mobile App.
This functionality becomes available/active one hour prior to the start of the Shift.
To Record kms, navigate to the Staff section of the Activity, once the Activity has been selected from your Roster:

Select the 'RECORD KMS' button, then enter the kilometres in the relevant field, e.g. 20 Private Kms:

Once saved, this will appear as follows:

Company or Private km recorded in the Mobile App automatically updates the corresponding km fields in the related Activity in the Web App.
For more information, we recommend reviewing the Recorded - Kms section of the Rostered, Recorded and Finalised Staff Shifts and Kms Overview article linked below.
Shift Sign Off
If your organisation requires staff to Sign Off their shifts in the Mobile and Web App, this functionality can be configured to 'On' per Service as required.
Configuration is completed in the 'Staff Shift Settings' column on the Services tab in System Preferences and applies to both the Web and Mobile App.
When configuring the 'Shift Sign Off' to 'On', there are two options: record 'Time Only' or record 'Time and Location'.
When either of these 'On' options is configured the 'Shift Sign Off' button will display on the 'Staff' tab of the Activity in the Mobile App for Activities created for that Service:

Staff may then select this button to Sign Off their Shift in the Mobile App. This also updates the 'Shift Sign Off' functionality in the corresponding Activity in the Web App.
Geolocation
When the Shift Sign Off is configured to 'On - Time and Location', and the 'Shift Sign Off' is performed, SupportAbility checks the staff member's geolocation to determine where they are performing the 'Sign Off'.
For a location to be recorded, permission must be granted in the phone settings.
Time and Location details may be viewed in the Web App by selecting the information icon in the 'Shift Sign Off' column:

Once selected, the 'Staff Shift Sign Off Details' window will open displaying who performed the Sign Off, the Date/Time and the Location, along with a map:

Removing the Shift Sign Off
Once the Shift Sign Off is performed, Staff with the Team Leader privilege and the rostered staff member may remove it in the Web App, in the case of a mistake for example, up until the Activity Sign Off has been performed, after which time this is no longer possible.
The same applies in the Mobile App, where a staff member may remove the 'Shift Sign Off' up until the Activity Sign Off has been performed, regardless of where the 'Shift Sign Off' was completed, i.e. either in the Mobile or Web App.
Once the Activity Sign Off has been performed, the 'Shift Sign Off' button will be greyed out in the Web and Mobile App, meaning this functionality can no longer be edited.
Settings
Settings can be accessed by selecting the cog icon on the bottom right-hand side of the screen:

This is where you can log out, change your PIN or your Password as required, and view other details, such as who your System Administrator is by selecting General Support.

Product feedback can also be submitted about the SupportAbility Mobile App via Settings. Please note that this facility is designed to collect feedback from direct users and is not intended as a support tool.
We hope you enjoy the Mobile App! If you require any Support at all, please get in touch with your manager or system administrator as a starting point.