How to create an Activity
This article outlines the places in SupportAbility where Activities can be created, and the steps involved in creating an Activity using the 'Add a New Activity' creation wizard.
The Activity creation process is the first step to set up an Activity, however, some additional steps are often required in the Activity record itself once the Activity has been created to finish the setup, such as filling and customising Staff Shifts and updating the Client's Funding Source and NDIS Support Allocations.
Further learning material is available in the related articles section below that outlines the other areas of functionality related to Activities, for example, how to replicate a set of recurring Activities, and how to set the Client's Funding Source and add NDIS Support Allocations.
Privileges: Staff Members require the following privileges to create, edit and manage Activities:
- The 'Team Leader' Staff Account privilege for the Site/Service that the Activity is being facilitated by
- The Global 'Team Leader for ALL Services' privilege, or
- If the Team Leader requirement has been deactivated for the Site/Service that the Activity is being facilitated by, then all Staff Members who work in this Site/Service will be able to create, edit and manage Activities
- More information is outlined in the Privileges required to manage Activities article linked below for reference.
Audience: Team Leaders, and anyone tasked with creating Activities
Summary
The following list summarises the content of this article. Click on the links below to take you to the relevant sections:
- Where can Activities be created?
- Add a new Activity
- Review Activity Prior to Creating
Where can Activities be created?
Activities can be created from several places in SupportAbility for Staff Members with the required privileges:
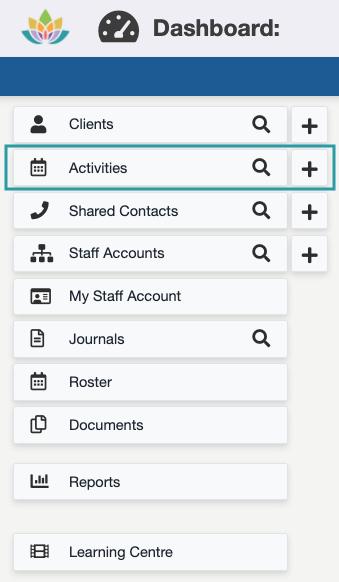
- Dashboard - by selecting the '+' icon next to the Activities Search:
- Client Activities tab - by selecting the '+ Add a new activity' button:
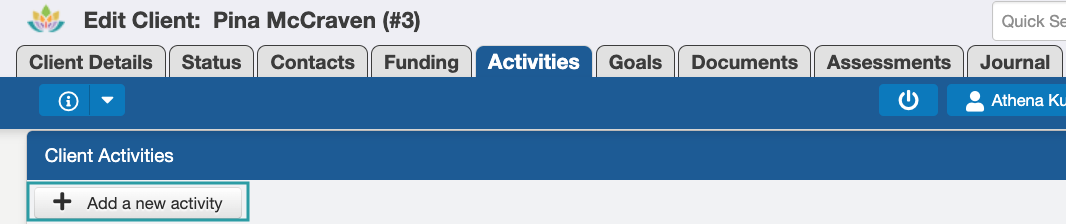 Noting that when an Activity is created from the Client record, the Client will be pre-selected by default. This is often used to create Activities for individual participants when required.
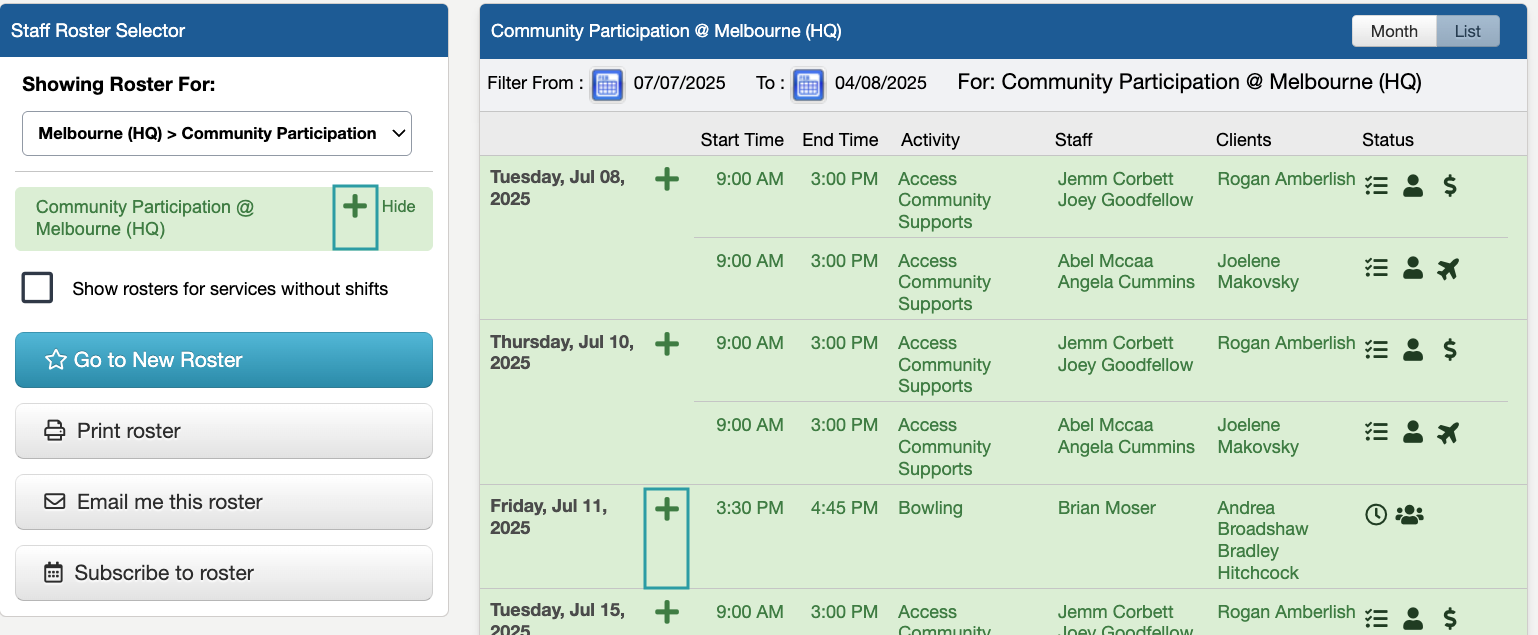
- Old Roster - by selecting the '+' icon in the 'Staff Roster Selector' or Roster:
- New Roster - clicking on the relevant date and time in the calendar, when Activity is selected for 'Data'; e.g. Fri 11 July at 10.30am
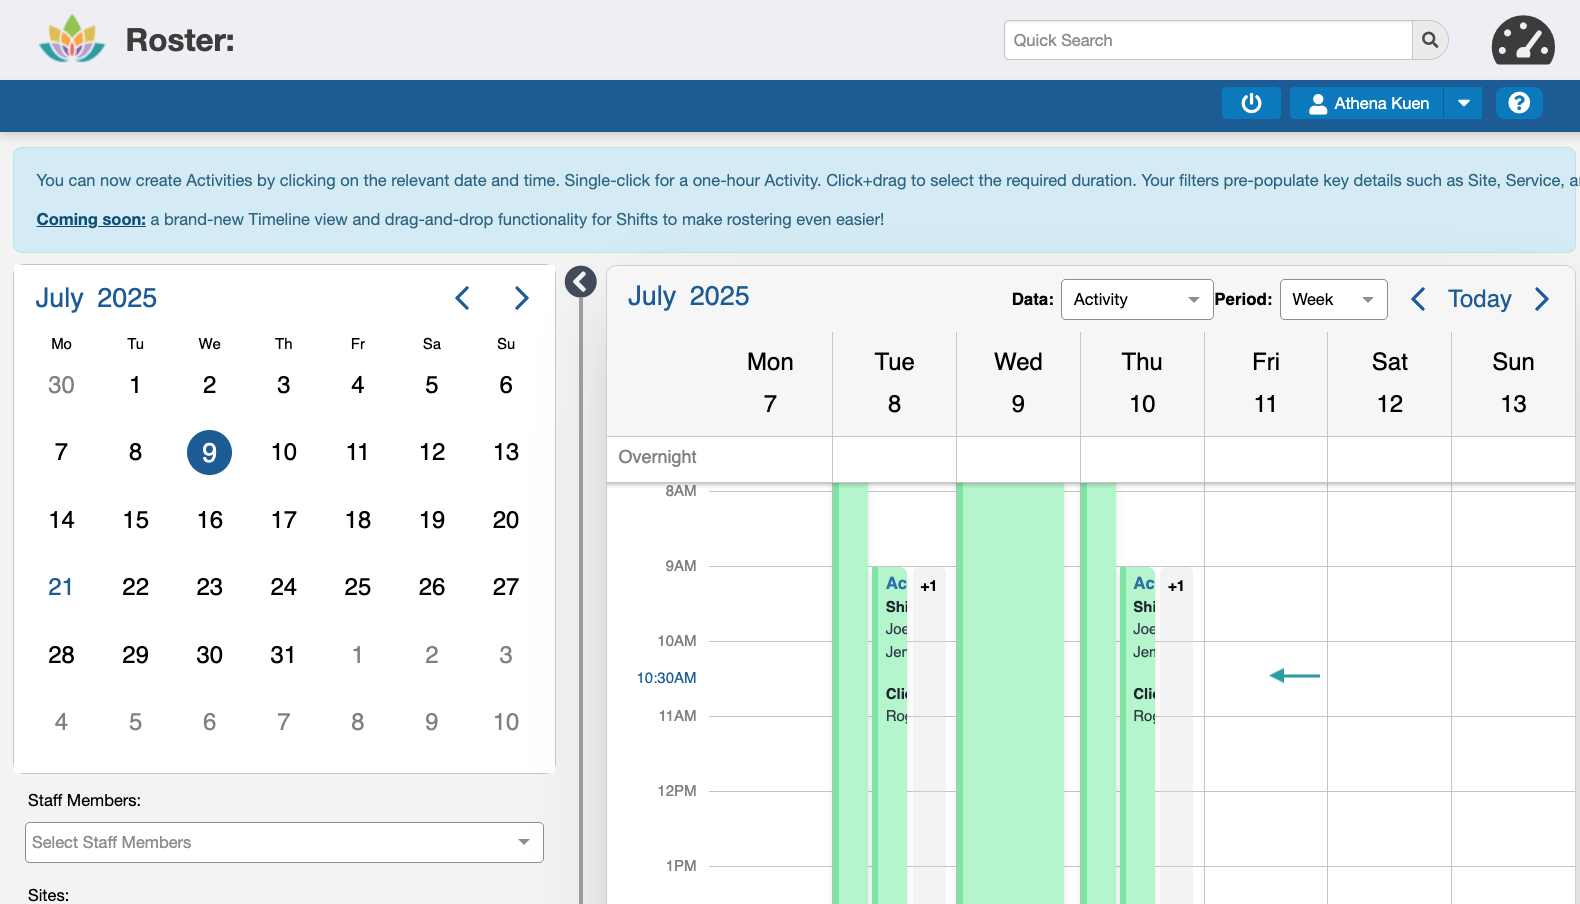 N.B. Your selected filters for the Roster pre-populate key details in the Activity such as Site, Service, Client, and Staff, saving you even more time. A single-click adds a one-hour Activity, and click+drag adds an Activity for the required duration.

 Noting that when an Activity is created from the Client record, the Client will be pre-selected by default. This is often used to create Activities for individual participants when required.

 N.B. Your selected filters for the Roster pre-populate key details in the Activity such as Site, Service, Client, and Staff, saving you even more time. A single-click adds a one-hour Activity, and click+drag adds an Activity for the required duration.
 Add a new Activity
Once any of the above options have been selected, the 'Add a New Activity' wizard opens. This comprises four steps as follows:
- Activity Details
- Clients
- Staff
- Confirm

Each of these steps has been outlined in more detail below.
Activity Details
This is where the Activity details are entered. Some of the data may be pre-populated depending on where it has been created from and if there were any pre-selected filters in the Roster:

The following information is required in order to create the Activity:
- Service (Service @ Site)
- From Date/Time and To Date/Time
- Activity (Activity name/description)


The remaining information can either be added here, or later once the Activity has been created, relative to which functionality/features your organisation is using:
- Location
- Program
- Activity Tag
- Replicating Staff Notes
- Non-Replicating Staff Notes
Service
The Sites/Services that display for selection are determined by the Sites/Services the Staff Member creating the Activity has access to in their Staff Account.
When a Staff Member has been granted the global 'Team Leader for ALL Services' privilege for example, then all Sites and Services will be available, and the scrollbar to the right can be used to locate the required option:

N.B. When a new Activity is created from the Client's 'Activities' tab, the Service list is displayed in the following sections; Current, Historical and Not Used, relative to the Client's Service Participation:

Date and Time
By default, the current Date and time of 12:00 PM is populated in the From and To Time fields:

N.B. The times displayed are based on a 12-hour clock format.
Selecting the calendar icon will open the date picker where the required date (Day, Month, Year) may be selected:

Selecting the clock icon will open the time picker where the required time may be selected. Using the up/down arrows increases and decreases the Time in 1-hour and 1-minute increments. Selecting the PM/AM button will adjust the Time period from one option to the other.

For quicker adjustments of time, the bolded hour or minutes may be selected to display a table of related preset options in 1-hour or 5-minute increments, respectively:


Activity Duration
Activities may be created for various date/time periods, as per the following examples.
On a single day for a couple of hours:

Or, spanning multiple days for a week-long period:

Multiple Shifts
Multiple Staff Shifts may be entered for Activities that span a multi-day period, and the same Staff Member can be added more than once if they are working multiple shifts in that period.
The Managing Staff Shifts article, linked below, provides detailed information about Customising Staff Shifts, Private Kilometres, Breaks, Not Paid, and Staff Time Sheet Sign Off.
Activity (Description Name)
The Activity Description is a mandatory dynamic field where each entry is remembered with the associated Site and Service. When entering a description, it is important to consider the naming convention to be used, as this will also appear on Invoices and Client Funding Statements.
Enter a brief description/name of the Activity, such as the type of Activity, and if required any key attributes which distinguish this Activity from other similar Activities e.g. Morning Social Meetups:

If Activities have been created previously with similar description names, these will display for selection as you begin typing:

Location
The Location should describe where the Activity is being facilitated, for example, the Client’s home address, the address of an external venue e.g. North St Community Hall, or a building or room on your organisation's premises e.g. Building A, Kitchen, Room 2 etc:

Similarly to the Activity description, if Activities have been created previously with the same Locations these will display for selection as you begin typing:

Program
The ability to select a Program will only appear if the Activity:Program List has been configured in System Preferences by your organisation. Programs are often related to finance integration and are therefore required if this has been configured:

Programs may be helpful when reviewing Activity data. The 'Program' filter can be utilised to refine the results generated in Activity-related Searches and Reports e.g. Activity Report:

More information on Programs is outlined in the Activity Programs List article linked below for reference.
Activity Tag
Adding Tags to Activities is optional, and while they apply to the Activity holistically Providers may also find them helpful for identifying Activities that contain specific Client or Staff attributes, such as individual Shifts with specific attributes e.g. Split Shifts, On-Call, Weekend, Overtime, Paid Meal Break, Staff Training etc.
Activity Tags are configured in System Preferences on the Tags tab.
Tags may be added when creating Activities or added later in the Activity record:

Replicating Staff Notes
Replicating Staff Notes, is a free text field and once information has been entered here, and the Activity is replicated to create a set, these Notes display in all Activities in the set.
Adding Replicating Staff Notes to Activities is optional, however, many providers find these useful for communicating key information to staff who are facilitating or delivering the service:

Replicating Staff Notes, may be added here when creating Activities, or added later when Rostering or managing the Activity.
Non-Replicating Staff Notes
Non-Replicating Staff Notes, is a free text field and information entered here only displays in the Activity where it was entered.
Adding Non-Replicating Staff Notes to Activities is optional, however, may be useful for communicating key information specific to this instance of service delivery, to staff managing or delivering the service:

Complete Activity Details
Once all Activity details have been completed select the 'Next: Clients' button to progress to the next step, where Clients may be added to the Activity:

Clients
This section discusses how to add Clients, as well as reviewing Client Availability issues.
The previously entered Activity details are displayed at the top of the window, followed by the list of Clients who participate in the Site/Service which was selected for this Activity. This is determined by the Site/Services listed in the 'Client Service Participation' section on their Client Details tab.
The Client's Availability is also displayed here. When a red No is displayed this may be due to them being scheduled into another Activity at the same or overlapping time.
Adding Clients
Select the checkbox next to the relevant Clients to be scheduled for this Activity:

To locate a Client in a longer list, begin typing the name of the Client in the Search bar. Related options containing the data entered will display for selection,
Select the checkbox next to the relevant client:

Complete Adding Clients
Once the relevant Clients have been added select the 'Next: Staff' button to progress to the next step, where Staff may be added to the Activity:

Staff
This section discusses how to add a Staff Member, or create the relevant number of Staff shifts as TO BE FILLED which can be filled at a later date in the Activity record.
The Activity details as previously entered will display at the top of the window, followed by a list of 'Service Staff' i.e. those who work in the Site/Service selected for this Activity, as listed in their Staff Account.
Below this is a list of 'Non-Service Staff' i.e those who do not have the Site/Service selected for this Activity, listed in their Staff Account.
N.B. It is important to note that Staff Members with high-level global privileges have access to all Sites and Services but are not listed under 'Service Staff', rather they are added under 'Non-Service Staff'. Non-Service staff can still be added to an Activity if required.

Adding Staff
Staff are added to the Activity by selecting the checkbox next to their name e.g. David and Jeremy:

To locate the required Staff Member in a longer list, begin typing their name in the Search bar. Options from both the Service and Non-Service Staff lists containing this data will display for selection.
Select the checkbox next to the relevant staff member:

N.B. Selecting the cross in the Search bar will clear the entry in this field and display the full list of Staff names again.
Additional Staff Information
Additional information is displayed here per staff member to assist with selecting the most appropriate staff member for this Activity:

This information includes the following:
- Agreed Hours: Staff Members' total ‘Agreed Hours’ for their Agreed Period, i.e. Week or Fortnight, as configured on the Human Resources tab of their Staff Account
- Potential Overtime: Staff Members' ‘Potential Overtime’ risk for the Pay Period inclusive of the selected Staff Shift and based on their Agreed Hours/Period. Calculated and displayed when your organisation's Pay Period has been configured on the Settings tab in System Preferences.
- Works With Preference: Coloured badges reflect whether the Client prefers to work with/not with the Staff Member, based on how this has been configured in the Status tab of their Client record.
- Available: Availability is determined by a couple of factors:
- the days of the week and hours that a Staff member is available to work across a seven day period as entered on the 'Availability' tab of their Staff Account.
- If the staff member has been rostered into one or more Activities that occur at the same time or that overlap the times of this Activity,
Staff can either be added here, or the relevant number of Staff shifts for the Activity duration can be added as TO BE FILLED, and filled with the relevant staff at a later date in the Activity record as required. More information on this is outlined in the next section.
N.B. Staff with Availability/Suitability issues can still be added to the Activity if required and appropriate to do so.
More information regarding this additional information can be found in the following articles linked below for reference:
- How to configure Staff Standard Availability
- Configuring the Pay Period for your organisation
- How to fill 'To Be Filled' Shifts and change a Staff Member in a Shift
Adding 'To Be Filled' Shifts
SupportAbility has the functionality to add Staff shifts as 'TO BE FILLED' when creating Activities; e.g. for expediency when creating Activities, when staff availability is unknown, or in cases where the Roster has not yet been defined, or an organisation does not yet want to 'publish' the Roster.
To use this functionality, simply add the number of required Shifts for this Activity in the 'To Be Filled Shifts' box:

This creates the two shifts as 'TO BE FILLED' in the Activity record:

Many Providers choose to use this functionality to set up the initial Activity, then replicate the Activity for the required period, e.g. for a term. They then only 'fill' these Shifts when they would like Staff to have these available in their Roster.
Activities that contain Shifts that are yet to be filled can be searched for by filtering the Activity Report by 'Staff Members: TO BE FILLED':

Further information regarding this is outlined in the Managing Staff Shifts article linked below for reference.
Customising Staff Shifts
By default Staff Shifts automatically reflect the Date and Time of the Activity.
Once the Activity has been created, the Rostered From-To Time of individual Staff Shifts may be customised as required by selecting the 'pencil' icon:

Only staff with the 'Team Leader' privilege may customise the Shift times in the 'Rostered' column.
Once the Shift has been customised the From/To Date and Time may be reverted to the Activity Dates and Times by using the corresponding curved arrow icon, which displays in place of the pencil when a Shift has been customised.
More information on customising Staff Shifts is outlined in the Managing Staff Shifts article linked below for reference.
Complete Adding Staff
Once the relevant Staff or 'To Be Filled Shifts' have been added, select the 'Next: Confirm' button:

Review Activity Prior to Creating
Once 'Next: Confirm' has been selected, a summary of the Activity (Details, Clients and Staff) displays providing an opportunity to review this information prior to creating the Activity:

Should anything require updating or changing the 'Prev:...' buttons may be selected to return to the relevant section for updating.
N.B. All data entered prior to the 'Add Activity' step is automatically retained when navigating between steps.
Once you are happy that the Activity Details, Clients, and Staff information are all correct, select the 'Add Activity' button to create the Activity.
Once selected, the 'Add a New Activity' window displays a message advising ' Your Activity has been created successfully':

From here, you have 3 options:
- View/Edit New Activity - select the link to access the newly created Activity record
- Close - selecting this button closes this window, and returns you to the place where the Activity was created from i.e. Dashboard, Client Activities tab, or Roster.
- + Create Another - opens the 'Add a New Activity' wizard where a new Activity may be created.
View/Edit New Activity
Selecting the 'View / Edit New Activity' button will open the Activity record.
The Activity record contains 3 tabs; 'Activity Details', 'Related Activities' and 'Cost Amortisation'.
This article focuses on the 'Activity Details' tab which is divided into four key sections; Activity Details, Replication, Clients, and Staff.
Information on each of these is outlined below.
Activity Details
This is where all of the information that was entered in the 'Activity Details' part of Activity creation is displayed.
Any information which was not entered when the Activity was created, eg. Location, Program, Replicating and Non-Replicating Staff Notes, Tags, Replicating Client Notes, can be entered here as required.

This is also where the Activity Sign Off is performed once all quality checks have been completed. Completing the Activity Sign Off essentially finalises the Activity, so NDIS, billing and payroll data is ready for claiming, invoicing, and payroll, respectively.
Please see the following articles linked below for more information:
- Adding and searching by Tags
- Activity Programs Lists
- Completing the Activity Sign Off
Replication
Selecting 'Replicate Activity' is how an Activity Set can be created for related repeated instances of service delivery with common attributes. e.g. Morning Social Meetups occurring every Monday for 12 weeks.
When an Activity is part of a replicated set, the Replication Management Settings can be used for efficiency to manage updates across the set, and replicate these updates in future Activities.
The corresponding Setting i.e. Settings, Clients or Staff, needs to be checked and the Activity saved to action the replication.

N.B. We highly recommend these settings are left unchecked to avoid unwanted changes to future Activities, and only used to replicate specific intended updates, then immediately turned off again.
Please see the following articles linked below for more information:
- Replicating Activities
- Replicating Changes to an Activity Set
Clients
The Clients added in this section of the Activity, either via the Activity creation wizard, or directly in the Activity record, forms the Clients schedule.
This section is where:
- Additional Clients can be added by selecting Show Service Clients Not Participating or using the 'Add a client' quick search feature
- Attendance is also managed within this section of the Activity record using the Absent and/or No Charge settings
- The Client's Funding Source determines how they will pay for the Activities they attend
- When NDIS Funding is selected, NDIS Support Allocations can then be created based on the Supports the Client has utilised
- The Funding Source and NDIS Support Allocations data is used to generate Direct Invoice Batches and NDIS Bulk Payment Requests (BPRs)
- Multiple Client Journals can be added for each individual from the Activity record. These are accessible here and also display on the Clients Journal tab.
Client Goals can be added and Goal Progress Assessments recorded in the Journal record.
This functionality is utilised for linking evidence and goals directly to service delivery. - Client Support Logs can also be completed (when configured), designed for Client's or their Nominee to confirm receipt of the NDIS Supports delivered
- Activity Costs for Non-NDIS Billable charges can be added here also as required

Please see the following articles linked below for more information:
- Allocating NDIS Support Items in Activities
- Programs of Support
- How to create a Client Journal (case note)
- Using the Client Support Log
- Activity costs
Staff
The Staff added in this section of the Activity, either via the Activity creation wizard, or directly in the Activity record, informs both Staff Members' Rosters and the Staff Time Sheet Batches, which can be utilised for Payroll.
This section can be updated as follows:
- Additional Staff shifts can be added as required by selecting + Add Staff
- Any Staff Shifts that are set as TO BE FILLED can be filled by selecting the TO BE FILLED button, or selecting the Actions menu and 'Change Staff Member'. Both of these open the 'Change Staff Member' modal.
- Rostered Staff Members can be changed by selecting the Actions menu corresponding to the relevant Staff Member's name, then selecting 'Change Staff Member', which opens the 'Change Staff Member' modal.
- Information relating to Staff 'Agreed Hours', 'Potential Overtime' if rostered into this Shift, the Client's 'Work With/Without Preferences', and Staff 'Availability' issues are all displayed in the 'Change Staff Member' modal to assist with rostering the most appropriate person. Some of this data only populates when your organisation's pay period has been configured.
- The 'From-To' Date and Time can be customised for each Staff Shift as required within or around the Activity time, by selecting the pencil icon
- The anticipated or maximum quantity for Private or Company Kilometres travelled for this Activity can be Rostered here. Alternatively, these fields can be left blank, thereby leaving staff to record these details in the 'Recorded' column.
This data is used for billing and/or reimbursement purposes. - If it is a requirement of your organisation, Staff can sign off their Shift by selecting the Shift Sign Off button.
- If a Shift includes a break, this can be noted by selecting Includes Break
- If Staff are not being paid for a Shift, this can be noted by selecting Not Paid
- Hovering over an icon in the Staff Member column will display status information such as, the Anchor indicates: Staff Positions to be filled. The Clock indicates: Shift Not Signed Off.
- Non-NDIS Chargeable Hrs automatically reflect the Activity duration, however, these can be updated ONLY if your organisation is using Rate Cards for Non-NDIS Billing, via the Actions menu.

N.B. Some of the actions performed by Staff e.g. entering Private and Company kilometres, Staff Shift Sign Off, and adding Client Journals, can also be performed in the SupportAbility Mobile App. Once completed there, this information displays in the Activity record in the Web App, in the corresponding places i.e. 'Recorded' and 'Shift Sign Off' columns in the Staff section, and 'Journals' column in the Client section.
Please see the following articles linked below for more information:
- Managing Staff Shifts
- Capturing Staff Kilometres - Private or Company
- Performing the Activity Sign Off