Finance & NDIS | Pilot
The purpose of this article is to step through the recommended approach for piloting the end-to-end Finance & NDIS processes using SupportAbility, specifically for Providers of Direct Services.
We understand there is a lot of information contained within this article, however, this comprehensive guide will assist your organisation to achieve the following outputs from the Finance & NDIS process:
- generate Bulk Payment Requests (BPRs) for upload to the myplace provider portal
- generate NDIS Direct Invoices for 'Accepted' NDIA Managed Supports for upload to your finance system for reconciliation
- generate NDIS Direct Invoices for Self and Plan Managed Supports for upload to your finance system to manage the Accounts Receivable process
Audience: Finance Team, Team Leaders, and those involved in the Finance & NDIS pilot.

Prerequisites
- Finance & NDIS | Preparation must first be completed prior to piloting this workflow, in order to be able to generate BPRs and export NDIA Invoices.
The following privileges are required in order to access and action specific functionality within this workflow:
- Only Staff with the privileges required to manage Activities can create and edit Activities, including updating the Client's Funding Source e.g. to their NDIS Funding, and performing the Activity Sign Off.
- Staff require the 'View Financial Information' and 'Edit Client Records Across ALL Services' or 'Team Leader for ALL Services' Staff Account privileges to access the 'Finance' menu and generate Bulk Payment Requests (BPRs) and Invoices.
Responsibilities
- Understand the privileges required to manage Activities and who in your organisation is, or will be, responsible for updating the Client's Funding Source and allocating NDIS Supports in Activities. Whilst many Staff may have the ability to perform the following actions, please consider who is best suited to:
- Update the Client's Funding Source to their NDIS Funding
- Staff must have the privileges required to manage Activities to perform this action
- N.B. Once updated, these privileges are not required in order to allocate Support Items
- Allocate NDIS Supports for the Services delivered
- Note that the Price and Total Value information displayed in the NDIS Support Allocations window is only visible to Staff with the 'View Financial Information' Staff Account privilege
- N.B. This privilege is also required to customise the Price of certain Supports where needed
- Review NDIS Support Allocations and perform the Activity Sign Off approval
- Staff must have the privileges required to manage Activities to perform this action
- The Activity Report and Activity Clients Report are designed to assist in locating Activities awaiting Sign Off. The related articles have been linked below for your reference.
- Update the Client's Funding Source to their NDIS Funding
Finance & NDIS Workflow
The following diagram provides a holistic overview of the end-to-end workflow for reference:

N.B. The 'Configuration' step is completed in the Finance & NDIS | Preparation phase.
Summary
The following list summarises the content within this article. Click on the links below to take you to the relevant sections:
- 1. Enter NDIS Direct Client Funding records
- 2. Activities
- 3. Allocate NDIS Support Items in Activities
- 4. Client Support Logs (optional)
- 5. Activity Sign Off
- 6. Generate a Bulk Payment Request (BPR)
- 7. Generate and export a Direct Invoice Batch for NDIA Managed Supports
- 8. Generate and export a Direct Invoice Batch for Self Managed and Plan Managed Clients
- 9. Finance Integration
- 10. Reconciliation
- 11. Reports and Search Tools
- 12. Payroll Pilot (optional)
N.B. As you work your way through each of the steps below, please refer to the learning material which has been linked for your reference, in the 'Related Articles' section at the end of this article for more comprehensive or related information.
1. Enter NDIS Direct Client Funding records
The first step in this process is to enter NDIS Funding information into each Client record which your organisation will be conducting the pilot for.
Entering the Client's NDIS Funding is required so that SupportAbility understands which Supports are valid when it comes to allocating these Supports in the Activities they participate in.
The funding entered usually reflects either:
- the Standard Service Booking/s your organisation has entered (for Client's who have Agency Managed funding), or
- the Schedule of Supports your organisation is set to deliver as outlined in the Service Agreement in place with the Client (for Client's who have a Plan Manager managing their funding or are Self Managing their funding).
NDIS Supports can be set at either the:
- Flexible Budget (Support Category) level when flexibility to allocate any of the Support Items within this Category is required, or at the
- Support Item level, when only specific Supports are valid, or when a Support Item requires a fixed custom price.
A Budget may also be added to NDIS Supports for the purpose of tracking Utilisation & Expenditure.
The Client's first NDIS Direct Funding record entered into SupportAbility
When creating a Client's very first 'NDIS Direct Client Funding' record in SupportAbility this is managed a little differently to the Client's subsequent NDIS Direct Client Funding records.
The workflow and functionality in SupportAbility is not set up to account for funds which have already been spent from a Client's NDIS plan and managed outside of SupportAbility
Start Date
The Start Date of the first NDIS Direct Client Funding record should align with the date your organisation is commencing to use SupportAbility to manage a Client's Funding, and generate Bulk Payment Requests (BPRs) and Direct Invoices Batches for importation into your organisation's finance system. This date in many cases will be partway through the Client's current NDIS Plan.
Example:
Andrea's NDIS Plan is valid from the 10th August 2020 to 9th August 2021. We are commencing to use SupportAbility to manage her funding from 1st November 2020, hence the Start Date of Andrea's initial funding record here is set to the 1st of November 2020, and the End Date corresponds with the End Date of her NDIS Plan:

Budget
When Client Funding records are created, NDIS Support Budgets are required for the purpose of knowing which Supports are valid for the Client so they may be allocated in the Activities the Client participates in. The way that NDIS Support Budgets are configured also determines how the Utilisation of this is tracked.
Due to commencing the initial Funding record potentially partway through the Funding Period, there are a few different approaches to entering the initial Budget.
NDIA Managed Funding
Our recommended approach for Clients whose funding is NDIA Managed is to reference the myplace provider portal on the date you are commencing to manage their funding in SupportAbility, and check the Client's remaining balance for any Service Booking/s in place.
These figures can then be entered as the Budget for each Category or Item in the Client's NDIS Direct Funding record. The 'Notes' fields can also be utilised to provide context, explaining the original budget amount as per the service agreement and recording the date that the Client's funding was commenced being managed in SupportAbility.
Example:
We have a Service Agreement with Client Andrea to deliver Category 04 Supports, to the value of $10,000. Our organisation is commencing to manage this Client's funding in SupportAbility from 1st November, which is partway through her NDIS Plan period (10/08/2020 - 09/08/2021):

According to the myplace provider portal on the date of commencement using SupportAbility (1/11/2020), Andrea's remaining funded balance for Category 04 Supports is $7,000.
Therefore when adding a Budget to Andrea's initial NDIS Direct Funding record in SupportAbility, a Flexible Budget for Category 04 has been added for the remaining balance i.e. $7,000, along with a Note explaining this:

A Flexible Category Budget has been added as greater flexibility is required when NDIS Supports are Allocated for her in the Activities she participates in.
N.B. NDIS Support Item Budgets can be configured in lieu of a Flexible Budget as required. More of this has been outlined below for your reference.
Self or Plan Managed funding
In cases where the Client's Funding is Self Managed or Plan Managed, if your organisation has a record of the remaining balance available we recommend entering this as per the above. However, if this information is not available or difficult to calculate accurately, a $0 Budget may be recorded for the purpose of making this Support available for Allocation and tracking Expenditure, but not Budget Utilisation. A $0 Budget is usually only necessary in this instance, however, it may also be required when a Support is needed but a Budget yet to be defined e.g. episodic Supports.
Example:
We have a Service Agreement with Client Saoirse whose Funding is Self Managed, to deliver a specific Support Item (09_009_0117_6_3). At the time of commencing to use SupportAbility to manage this Client's Funding, an accurate figure of the remaining balance was not available. In light of this, the relevant Support Item has been added specifically and configured with a $0 Budget. A note has also been added to explain this:

N.B. Remember to select 'Requires Budget' when adding Support Items, even when the amount is $0, to ensure they are configured correctly and usable when allocating Supports in Activities.
Client Funding resources
We recommend any Staff tasked with entering Client Funding records review the following comprehensive training videos. These videos are linked below for reference, however, they are also available in the 'NDIS Direct Client Funding' section of the Finance tab in the Learning Centre of your installation, accessed via the Dashboard:

- NDIS Direct Client Funding video for a complete guide to creating the Client Funding record.
- Setting the Financial Plan Manager (FPM) video for an overview of the options regarding the Financial Plan Management of a Client's NDIS Funding.
- Creating an NDIS Financial Plan Management (FPM) Contact video regarding how to create an NDIS FPM Contact and why setting this correctly is important.
2. Activities
Activities reflect the Services your organisation delivers and includes the Clients & Staff that participate in them. Here we discuss how to get started with Activities, or how to locate existing Activities if your organisation is already underway with this functionality.
Getting started with Activities
If your organisation has not yet commenced using Activities, they'll need to be created first, before the Client's NDIS Funding can be selected as the Funding Source and the relevant NDIS Supports they've used can be allocated for each Client in the Activity. This is outlined in the next section.
Please review the Privileges required to manage Activities article (linked below) to ensure these have been set up correctly for Staff involved in this pilot.
We recommend Staff tasked with creating Activities review the Activities Workflow video, as this resource covers each of the steps involved when creating and managing Activities. We recommend reviewing the following chapters of this video specifically:
- Set-Up Prerequisites
- Activity Creation Wizard
- Activity Set-Up
This video may also be found in the 'Workflow' section of the Activities tab in the Learning Centre of your installation:

How to locate existing Activities
To locate existing Client Activities, Staff may utilise the following:
- Option 1 - use the Support Filters in the Activities tab on a specific Client record, or
- Option 2 - generate the Activity Clients Report.
Option 1: Client::Activities tab
In this example, we can see the Activities that our Client Andrea has been scheduled into by navigating to the Activities tab of her Client record:

To filter down the list of Activities, select 'Show Client Support Service Filters':

In this example we need to allocate NDIS Support Items within Activities which fall in our current fortnightly invoicing cycle of the 2nd November - 15th November, therefore this date range has been entered into the Activity 'From Date' and 'To Date' filters:

Select 'Apply Filter' and scroll down. This search yields the required results, i.e. displaying the Activities this Client participates in, which have '0 NDIS supports' for Chargeable Items:

N.B. The results are displayed in amber in this example, as these Activities occurred in the past.
Selecting the target icon for each of the Activities in the results list will open the Activity where the Client's Funding Source can be updated to their NDIS Funding, and the relevant Support Items can be allocated for this Client, as outlined in the next section of this article.
Option 2: Activity Clients Report
Alternatively, the 'Activity Clients Report', accessed via the Activity Reports section in the Reports menu, can be used to locate the Activities a Client has been scheduled into.
Here we have selected the following search criteria, Client: Andrea Broadshaw, Site: Melbourne HQ, Service: Day Services, Activity Date range set to 2nd November - 15th November, and Activity Sign Off Status set to 'Not Signed Off':

The following list results have been generated using the above search criteria:

The sum of Client NDIS Allocated Hours is listed at the bottom of the Results List. In the example above this is displaying as '0' as no Supports have yet been allocated in these Activities.
To navigate to each of these Activities, we recommend selecting (right-click) on the target icon, and opening it in a new tab:

Alternatively, when you have selected an Activity, navigating to the 'Actions' menu will allow you to 'Return to Activity List':

Now that Client Activities have been created, or located, the Client's Funding Source can be updated (i.e. select their current NDIS Direct Funding record), and the relevant NDIS Supports can be allocated within these Activities, as outlined in the next section.
3. Allocate NDIS Support Items in Activities
Once NDIS Direct Client Funding records have been entered and Clients have been scheduled into Activities:
- The Client's Funding Source within the Activity can be set to their NDIS Funding, and
- NDIS Support Allocations may be entered.
- Information is provided below, however, please review the Allocating NDIS Support Items in Activities article (linked below) for comprehensive instructions.
NDIS Support Allocations
Let's step through updating the NDIS Support Allocations for our example Client Andrea.
First, the Funding Source must be updated for this Client from 'Billable (No Funding)':

To their NDIS Funding:

N.B. Only Staff with the privileges required to manage Activities can update the Client's Funding Source.
Once the Client's NDIS Funding has been added as the Funding Source within the Activity, Staff Members who have access to the Client and the Activity can then add NDIS Support Allocations as required.
If the Activities your organisation is piloting are related to a Program of Support, please review the Programs of Support article, linked below for reference, for further details regarding this functionality.
To allocate the NDIS Support Items when either setting up the Supports that will be delivered, or those that have been delivered, select the 'Allocate NDIS Support Items' button:

Once selected, the 'NDIS Support Allocations' window opens which is where Supports are added, the Quantity is entered, the Claim Type may be selected (as required), and the Portion selected for Group Supports (if relevant). Please see the Apportioning the Price of Group Supports article, linked below.
The NDIS Support Items configured in the Client's NDIS Direct Funding record, or those most recently allocated, will pre-populate and be available for completion.
If the required Support is not pre-populated the Support Item may be searched for via the 'Add Support Item' field. Simply type one of the following - the full or partial name of the Support, Reference Number, the Category number e.g. 01, the ratio eg. 1:1, Day e.g. Weekday, for a list of results.
Assuming the Client has this Support Item or the related Category Flexible Budget included in their Funding record, it will be available for selection.
In this example, our Client Andrea has a Flexible Budget for Category 1, and we need to search for and allocate a specific Support Item for Short Term Accommodation with a ratio of 1:1:

Once a Support has been selected, add the 'Quantity', relative to the Unit of Measure for this Support Item/s and ensure Claim Type is set correctly:

N.B. Only Staff with the 'View Financial Information' privilege will be able to see the Price and Value columns.
Save NDIS Support Allocations
Once NDIS Support Allocations have been completed select 'Save NDIS Support Allocations' and 'Exit'.
Once allocated successfully, the Funding Source will be updated to indicate the NDIS Support Items have been allocated:

Replicating Client NDIS Support Allocations
If the Activity is part of a replicated set, you may wish to save the Client's NDIS Support Allocations to all future Activities in the set.
This is where the Replication Management Settings can be used. Simply activate the 'Clients' checkbox in the 'Replication For Set' column:

Once the Activity record is saved, all changes made to the Clients section of the Activity will be replicated through to the remaining future-dated Activities in the set.
It is important to ensure that Staff Members deactivate this setting after the required changes have been made, as leaving them on may cause issues with information being replicated accidentally when the Activity Sign Off has been performed.
Please review the Replicating Activities article (linked below) for more comprehensive information regarding this feature.
4. Client Support Logs (optional)
If your organisation has decided to use the Client Support Log feature, once this been configured for the required Services, following NDIS Supports being allocated, it will be available for completion:

We recommend that any Staff Membersusing this feature review the following:
- What is the Client Support Log? video:
- The Client Support Log is a feature designed to confirm receipt of the NDIS support items as delivered in the direct services provided to Clients via Activities.
- 'Support Log Evidence Required' Activity setting video:
- Outlines this setting is only available for Services that have been configured to having this to 'On by default' or 'Off by default'.
- Using the Client Support Log video:
- Covers completing a Support Log via Digital Signature, or Evidence Received, Support Log information and removal, along with how to find completed Support Logs.
There are also a number of articles regarding this functionality available in our Knowledge Base, which have been linked below for your reference.
These videos may also be found in the 'Client Support Log' section of the Features tab in the Learning Centre:

5. Activity Sign Off
In order for the NDIS Supports Allocated to be included in a BPR or Direct Invoice Batch, an Activity must first be 'approved'. We call this approval process, performing the 'Activity Sign Off' in SupportAbility.
Staff require the privileges to manage Activities to complete this action. By default, this is the Team Leader privilege.
Locating Activities awaiting Sign Off
The best way to locate Activities awaiting Sign Off is to use the Activity Report.
For example, if we wish to approve Activities for a specific period, we may enter the following criteria:
- Sites: Melbourne (HQ)
- Services: Day Services
- Activity Date::From and To: 2nd to 15th of November
- Activity Sign Off Status: 'Not Signed Off'

This report provides us with a list of Activities awaiting Sign Off:

Most Providers find opening each of the Activities for approval in a new tab the easiest way to navigate this report. Right-click on the target icon and select 'Open Link in New Tab', or CTRL + (mouse) click, to do so:

Alternatively, 'Return to Activity List' may be selected from within an Activity record:

Review the Activity
It is recommended each Activity is reviewed to ensure all of the requirements for each Client participating in the Activity have been met for approval, before the Sign Off is performed.
We recommend reviewing the NDIS Support Items Allocated to ensure they are correct and that appropriate evidence has been recorded i.e. Journal entries and the Client Support Log completed (where required):

To view any Client Journals that have been created from the Activity, select the numbered list icon.
To view the completed Support Log, select the information Support Log icon.
Performing the Activity Sign Off
To perform the Activity Sign Off, select the 'Sign Off' button within the Activity Details:

Once this action has been completed, the Activity is essentially locked and becomes read-only. Following this BPRs, Invoice Batches and Staff Time Sheet Batches may be generated.

The Activity Sign Off may only be removed by Staff with the required privileges up until BPRs, Invoice Batches and/or Staff Time Sheet Batches are generated.
6. Generate a Direct Bulk Payment Request (BPR)
Once Services have been delivered, NDIS Supports have been allocated and the Activity Sign Off has been performed, Agency Managed NDIS Support Allocations will be available for inclusion in a BPR. The BPR can then be exported for upload to the myplace provider portal.
Comprehensive information regarding this process is outlined in the Generating an NDIS Direct Bulk Payment Request (BPR) article linked below.
The following information steps through an example of this workflow.
Generate the BPR
To generate a BPR, navigate to the 'Finance' menu via the Dashboard:

Select 'Generate Direct BPR' from the Direct Services section of the Finance menu:

Search for Allocations
The first step in the process is to search for the NDIS Support Allocations you would like to include:

In this scenario, our organisation is registered to deliver NDIS Services in Victoria, and we are wanting to search for all available Allocations, hence we are leaving all search criteria empty. However, if you wanted to limit this, the relevant search criteria can be applied.
N.B. The Search will automatically set the To Date to the current date, as it is not possible to include future-dated Allocations.
Select the Allocations to include
Once 'Search' has been selected, the available NDIS Support Allocations are displayed. Select the NDIS Support Allocations you wish to include, then select the 'Create BPR' button:

Once 'Create BPR' has been selected, a summary of the number of Support Allocations selected is displayed, as well as the total dollar value this equates to:

Select 'Confirm' to complete this process.
BPR generated
Once Confirmed, the BPR has been generated and you will be redirected to the 'Edit Direct BPR' page where a summary of this is displayed:

Download the BPR
The Direct BPR is available to download from the Actions menu in the top right corner of the screen:

Selecting this will download the BPR file CSV export, formatted to the NDIA's specific requirements. There should, therefore, be no need to open this CSV as it is already in the specific format required by the myplace provider portal. If this is opened in a program such as Microsoft Excel, it may result in the data being changed inadvertently from the required format upon saving. If you do choose to review the file, please follow the instructions outlined in the How to open CSV files safely in Microsoft Excel article (linked below).
Submit the BPR
Once downloaded, the BPR is then available to submit to the myplace provider portal manually.
We recommend using the myplace provider portal step by step guides to assist you with how to submit Bulk Payment Requests.
Claim Status
When a BPR is generated, each Allocation has ‘No Claim Status’. This is to allow for the Claim Status to be updated, based on the results of the Bulk Payment Request submission to the myplace provider portal. The Claim Status of each Allocation is updated automatically by uploading the Bulk Payment Results File (BPRF) downloaded from the myplace provider portal.
It is important to note that only Accepted Allocations, i.e. successful claims submitted to the myplace provider portal, can be included in a Direct Invoice Batch created from the BPR. This is to ensure accuracy between SupportAbility, the portal and your organisation’s finance system.
Upload the Bulk Payment Results File (BPRF)
Following the BPR being downloaded from SupportAbility and uploaded to the myplace provider portal, within approximately 20 minutes the Bulk Payment Results File (BPRF) is processed and available to download from the portal.
By uploading this Bulk Payment Results File into SupportAbility:

The Claim Status of each Allocation is updated automatically and represented visually, based on this information:
- Successful claims are updated to 'Accepted', along with the exact claim value being paid
- Any claims that have resulted in an error appear as 'Rejected', along with the reason for this, and
- Any differences between what was submitted in the BPR and what is included in the BPRF are highlighted for reference.

Detailed information about this functionality is outlined in the Uploading the Bulk Payment Results File (BPRF) article, linked below, and in the video of the same name accessed via the 'NDIS Direct Bulk Payment Requests' section on the Finance tab of the Learning Centre in your installation.
7. Generate and export a Direct Invoice Batch for Accepted NDIA Managed Allocations
Once the BPRF has been uploaded to SupportAbility, only 'Accepted' Allocations are available for inclusion in NDIA Invoices generated in a Direct Invoice Batch from the BPR. This means that only Invoices for successful claims at the correct value can be generated. This ensures the data is perfectly aligned between all systems and eliminates the need for cross-referencing, corrections & adjustment of these Invoices in your finance system.
To generate an Invoice Batch from a BPR, select 'Generate Direct Invoice Batch' from the Actions menu:

Once this has been selected, a summary of the number of included Accepted Allocations is displayed, as well as the total dollar value this equates to, ready for confirmation:

Once Confirmed, you are redirected to the 'Edit Invoice Batch' page, as the Direct Invoice Batch has been generated and a summary of this is displayed:

Download the CSV file
These Invoices can be downloaded via the Actions menu for the relevant finance system:

Once the CSV file has been downloaded it can be uploaded to your financial system as required.
Accepted Allocations that have been included in an Invoice Batch are updated to have the Processing Status of Completed in the BPR:

Detailed information is outlined in the Generating a Direct Invoice Batch for NDIA Invoices article, linked below
8. Generate and export a Direct Invoice Batch for Self Managed and Plan Managed Clients
Direct Invoice Batches need to be generated for Clients who are Self Managing their NDIS funding or a Plan Manager is managing their NDIS funding on their behalf.
Generate an Invoice Batch
To generate an Invoice Batch for Self Managed or Plananaged Clients, navigate to the 'Direct Invoices' section of the Finance menu and select 'Generate Direct Invoice Batch':

In this example, we are generating Invoices relating to all Self Managed and Plan Managed Funding, searching for Signed Off Activities for the first half of November, for all Services which are delivered at the Melbourne (HQ) site, and we're limiting Funding to that which has been set to NDIS:

Once 'Search for Invoices' is selected, available Invoices will be displayed.
With relevance to our example Clients, you can see here an Invoice has been generated for Contact: Mary O'Sullivan who is managing the NDIS funding for her daughter - Client: Saoirse O'Sullivan as configured in her Client Contacts tab. Please see the Client Billing Contact article linked below for more information.
An invoice has also been generated for FPM: 'Plans R Us' who are the Plan Manager for Client Jordan Ellis:

Select the checkboxes of those Invoices you wish to include in the Batch then select the 'Generate Invoices For Batch' button:

Confirm your wish to proceed by selecting the 'Generate Invoices' button:

SupportAbility will then generate an Invoice Batch number e.g. #22, and create Invoices for each debtor with a unique Invoice Number:

N.B.
- Please refer to the Invoice Formatting article (linked below) for more information regarding configuring the Invoice Number generated by SupportAbility.
- The Invoice Date is the date that the Invoice batch was generated (e.g. 24/11/2020), however, this may be edited as required by selecting the 'Change' button.
- An Invoice may contain multiple Invoice Items (NDIS Support Allocations) for the various Activities the Client has participated in during the reporting period
Once a Direct Invoice Batch has been generated, an export file containing Invoice data is available to download from the Actions menu for various financial systems e.g. MYOB, Xero etc. and is designed to be imported into your organisation's finance system. Your finance system is then responsible for distributing these Invoices to the relevant parties where required, as well as managing the accounts receivable process.
Export an Invoice Batch
To export an Invoice Batch, select the 'Actions' menu and download the relevant Invoice Batch export for your finance system:

For more information, please review the Generating a Direct Invoice Batch article (linked below).
Finance system not listed?
If the list of available Invoice Batch exports does not include the Finance System your organisation uses, a Custom Finance Integration export may be required. More information can be found in the Custom Finance Integration article (linked below). If your organisation deems that this is required, please have your Authorised Representatives contact our Customer Success team as soon as possible.
9. Finance Integration
We suggest checking that the Invoices imported into your Finance system from SupportAbility are formatted correctly. If any layout changes are required, this will need to be configured in your Finance system. If there are any issues with the data presented in these Invoices, please review your system configuration and the end-to-end process outlined in this article to ensure that all steps have been completed correctly.
It may also help to review the relevant Finance Integration article specific to your organisation's Finance system e.g. MYOB, Xero or Zed Axis (linked below). A map of the Invoice batch export headers, along with the corresponding SupportAbility data fields is included in each of these articles.
N.B. If the Invoice Batch export has been customised for your organisation, please refer to the specification requirements of your Finance system that has been provided to us to build the custom export.
10. Reconciliation
Once Supports have been allocated, and BPRs and Invoice Batches have been generated, this information is referenced in the following areas of SupportAbility; Client records, Activity records, Funding records, and Searches and Reports within the Finance menu.
Activity records
The Finance column in the Client's section of the related Activity contains a link to the associated Finance records:

Once selected the Financial Records modal appears linking to the relevant BPR and Direct Invoice Batch these Allocations have been included in:

Funding tab in the Client record
Client Invoices are also displayed in the Direct Invoices section on the Funding tab of a Client record, as per our sample Clients:
Andrea:

Saoirse:

Budget Utilisation
The Utilisation tab of the Client's NDIS Direct Funding record will begin to reflect expenditure once NDIS Supports are allocated in Activities:

Allocated Expenditure is broken into its respective billing status as follows:
- Planned - the total value of all NDIS Support Allocations that have not yet had the Activity Sign Off performed. This usually represents services yet to be delivered or those that are yet to be finalised.
- Claiming - the total value of all NDIA Managed NDIS Support Allocations that have had the Activity Sign Off performed and are awaiting inclusion in a Direct BPR or have been included in this process but are not yet Accepted.
- Used - the total value of all Self and Plan Managed NDIS Support Allocations that have had the Activity Sign Off performed, and NDIA Managed NDIS Support Allocations that are Accepted.
For more comprehensive information about Funding Utilisation please refer to the NDIS Direct Client Funding Utilisation article (linked below).
11. Reports and Search tools
NDIS Budget Utilisation Report
The NDIS Budget Utilisation Report allows providers to search for the NDIS Client Funding Support Budgets as configured in NDIS Client Funding records via a range of search criteria. It is a useful report to track the Utilisation of NDIS Support Budgets holistically, for multiple Clients, simultaneously:
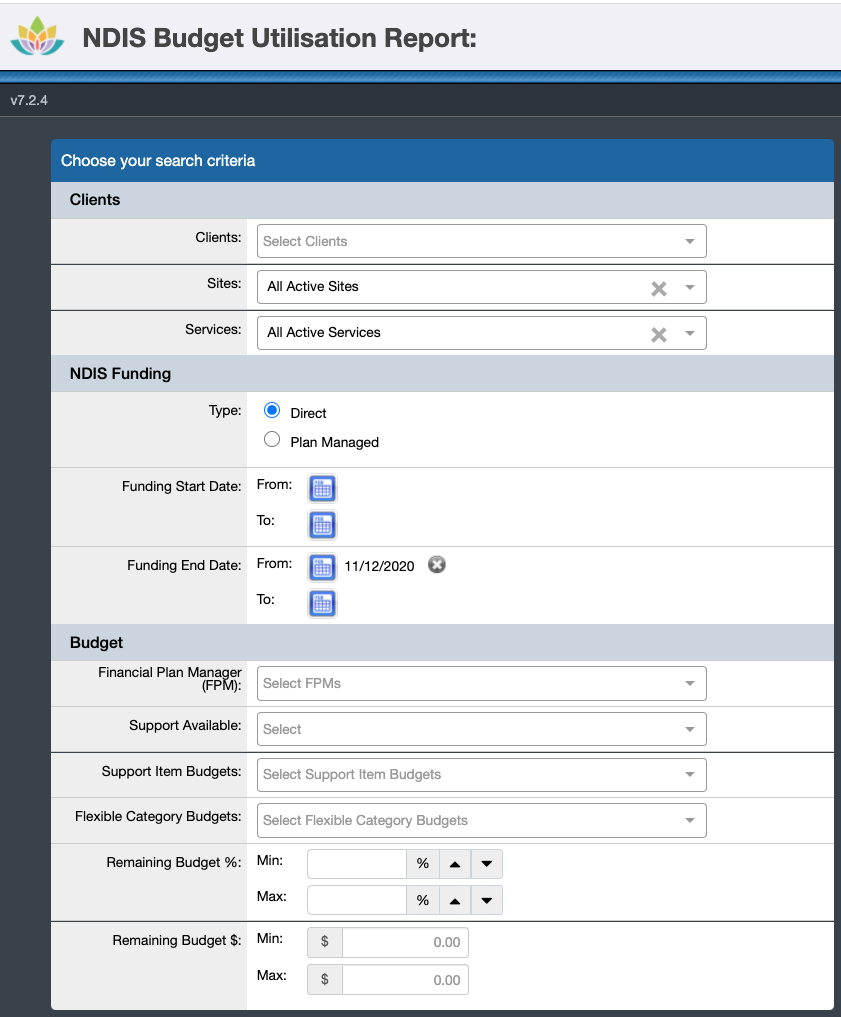
This Report is accessible via the 'Client Funding Reports' section of the Reports menu, and the 'View Financial Information' Staff Account privilege is required in order to generate it. The results returned are based on the Client records that the individual has access to.
A comprehensive export is available to download when more detailed information is required, allowing providers to analyse this information outside of SupportAbility.
Further detailed information is available in the NDIS Budget Utilisation Report article linked below.
View Direct BPRs
Every BPR generated in SupportAbility remains available to view in the Direct Services::Bulk Payment Requests (BPRs) section of the Finance menu:

Details of their Claim Status (e.g. Accepted), Processing Status (e.g. Completed), related Invoice Batches, and Notes will be displayed:

N.B. The Claim Reference number attributed to each NDIS Support Allocation included in a Direct Bulk Payment Request (BPR) is displayed in the 'Support Item' column.
Detailed BPR Report
A 'Detailed BPR Report' including a full list of all of the Allocation information displayed on the screen is available from the Actions menu in the Edit BPR screen:

This export provides a mapping of each Allocation with all of the associated data including Activity details, Support Item details including Claim Status, BPR details, and once an Invoice Batch has been generated, the Invoice Item Reference, Invoice Number and Invoice Batch it is associated with.
Allocations Report
The Allocations Report, accessible via the Finance menu, allows providers to search for Client NDIS Support Allocations via a range of search criteria:

In order to generate this report, the ‘View Financial Information’ Staff Account privilege is required, in combination with either:
- the ‘Edit Client Records Across ALL Services’ privilege, or
- the ‘Team Leader for ALL Services’ privilege.
It is a useful report to identify actual or projected revenue for specific Services, Sites, NDIS Support Categories, NDIS Support Items, NDIS Registration Groups, Plan Managers, and many other cohorts.
It also provides reporting on the financial processing status of Allocations. Specifically for Allocations associated with Agency Managed Supports by being able to search for Allocations that are Accepted or those that are Rejected and the accompanying processing status i.e. Pending Action, Marked for Retry, Marked for Cancellation, processed as Cancelled or in a state of Retry. Or for Allocations that are associated with alternative Financial Plan Managers i.e. Clients, Client Contacts or FPM Contacts as required and by Invoicing Status.
Further detailed information is available in the Allocations Report article linked below.
Direct Invoice Batch
Every Direct Invoice Batch generated in SupportAbility remains available to view in the Direct Services::Direct Invoices section of the Finance menu:

Selecting 'List Direct Invoice Batches' will display a list of Invoice Batches which have been generated to date. Selecting the target icon for a specific Batch will open the Batch displaying the related invoices:

Invoice Search
The Invoice Search tool, accessible by selecting 'Search Direct Invoices' from the Direct Services section of the Finance menu:

Invoices can be filtered by specific Clients, Debtors, Invoice Numbers and/or Invoice Dates. In the example below, we have filtered our Search for Invoices dated in the month of November:

This has returned a list of results which includes our sample Clients Andrea, Saoirse and Jordan:

12. Payroll Pilot
If your organisation has determined that Time Sheet batches will be required for Payroll, it is recommended that your organisation also completes a Finance & NDIS | Payroll Pilot process in addition to, or alongside, this. In readiness for this pilot, Providers will first need to complete the Finance & NDIS | Planning and Finance & NDIS | Payroll Preparation. More information is available in the Finance & NDIS | Payroll Preparation and the Finance & NDIS | Payroll Pilot articles (linked below).
What's next?
Following your organisation successfully conducting a pilot of these processes, it is important to consider any lessons learned that may impact the Integration of these processes in the final stage of implementation.